
User Guide
How to Create a New Sensitive Data Scan
Overview
What is a Sensitive Data Scan?
Spirion Sensitive Data Platform searches or "scans" your environment using something called agents.
-
Scans are the searches that agents perform on endpoints (targets) to find either the file locations (Discovery Scan) or find specific data types (Sensitive Data Scan) within the files and folders
-
Sensitive Data Scans enable you to search for specific data types (social security numbers, telephone numbers, etc.) within files and folders at different locations (and take actions on them based on the playbook rule defined for them)
A playbook is a set of rules which define the action(s) to take (redact, quarantine, shred, etc.) when Sensitive Data Platform discovers sensitive data during a scan of your environment.
For example, a playbook action (after a scan completes) may be to notify specific data found by a scan to a specific department for review and remediation.
Differential Scanning
-
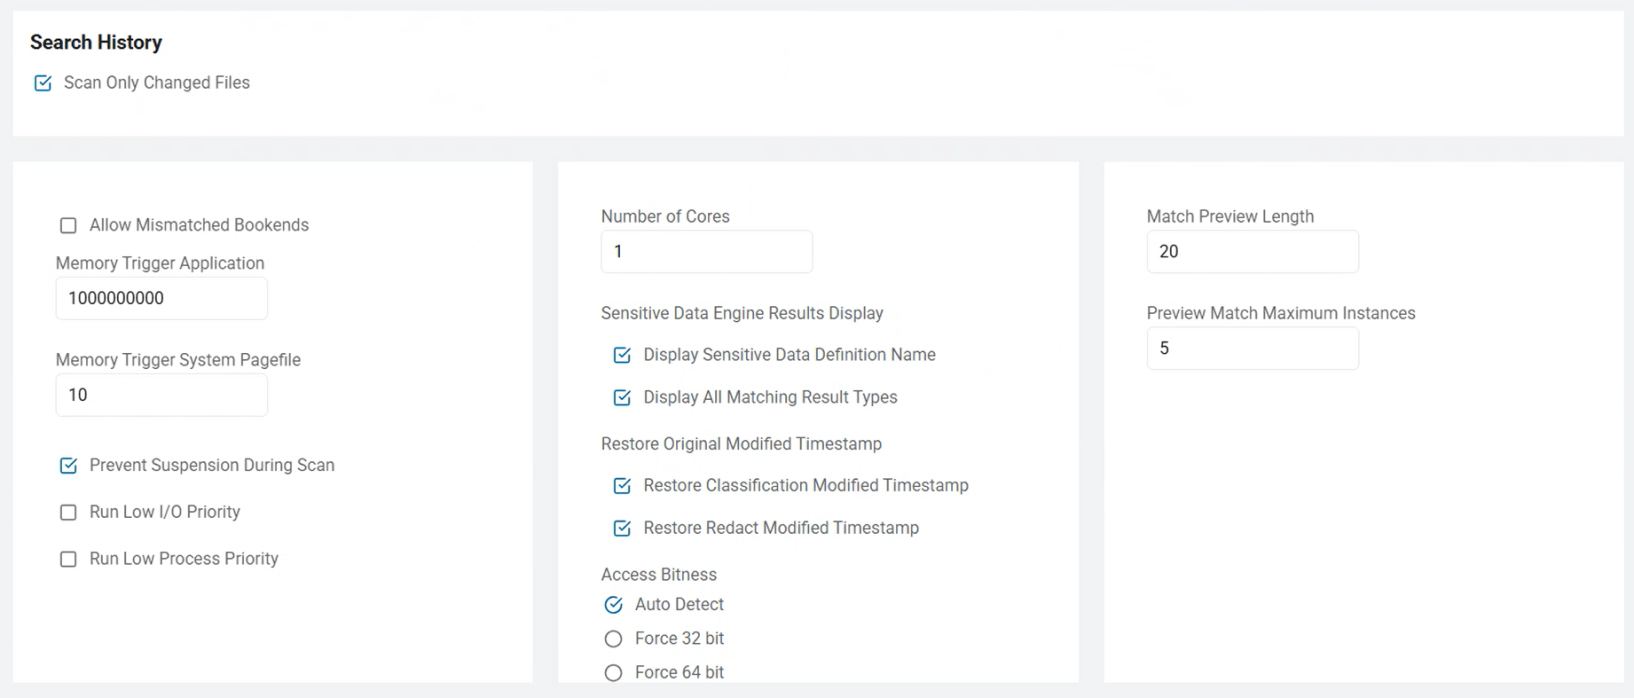
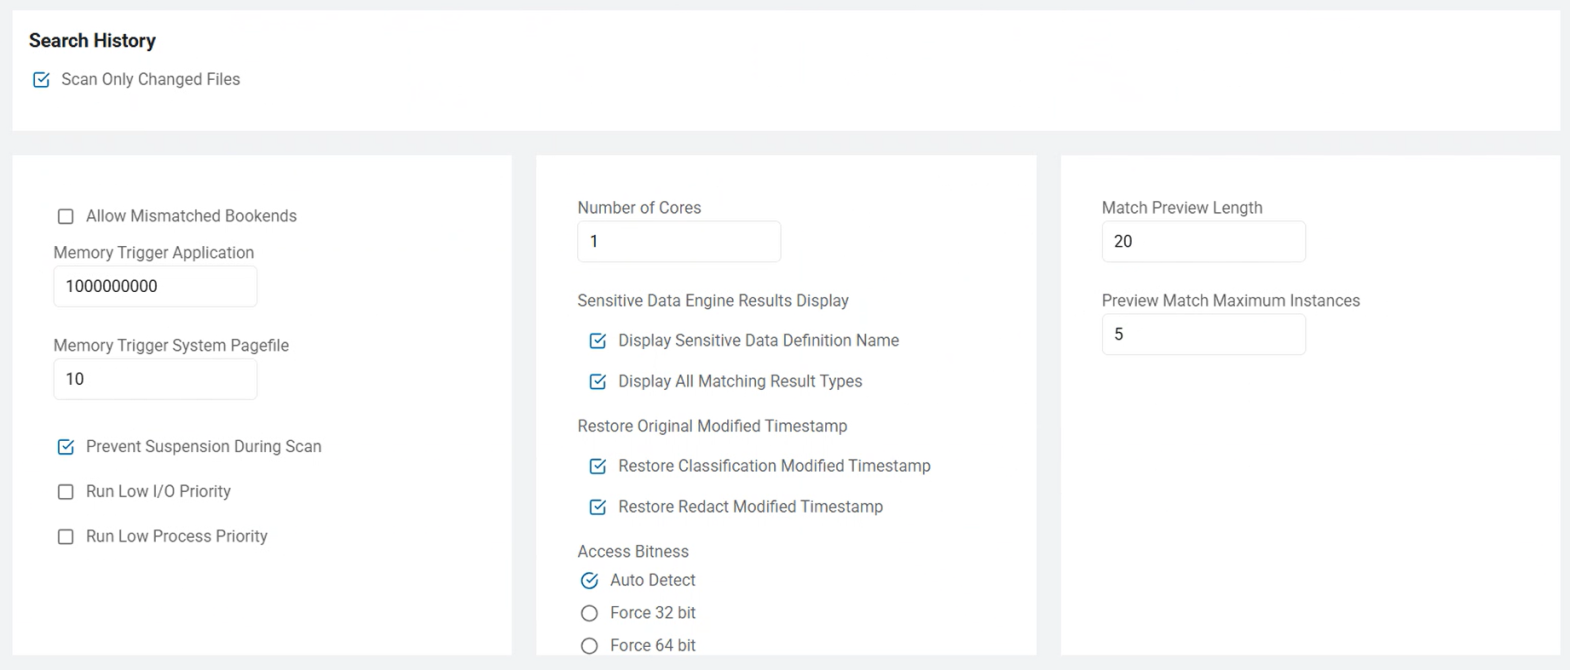
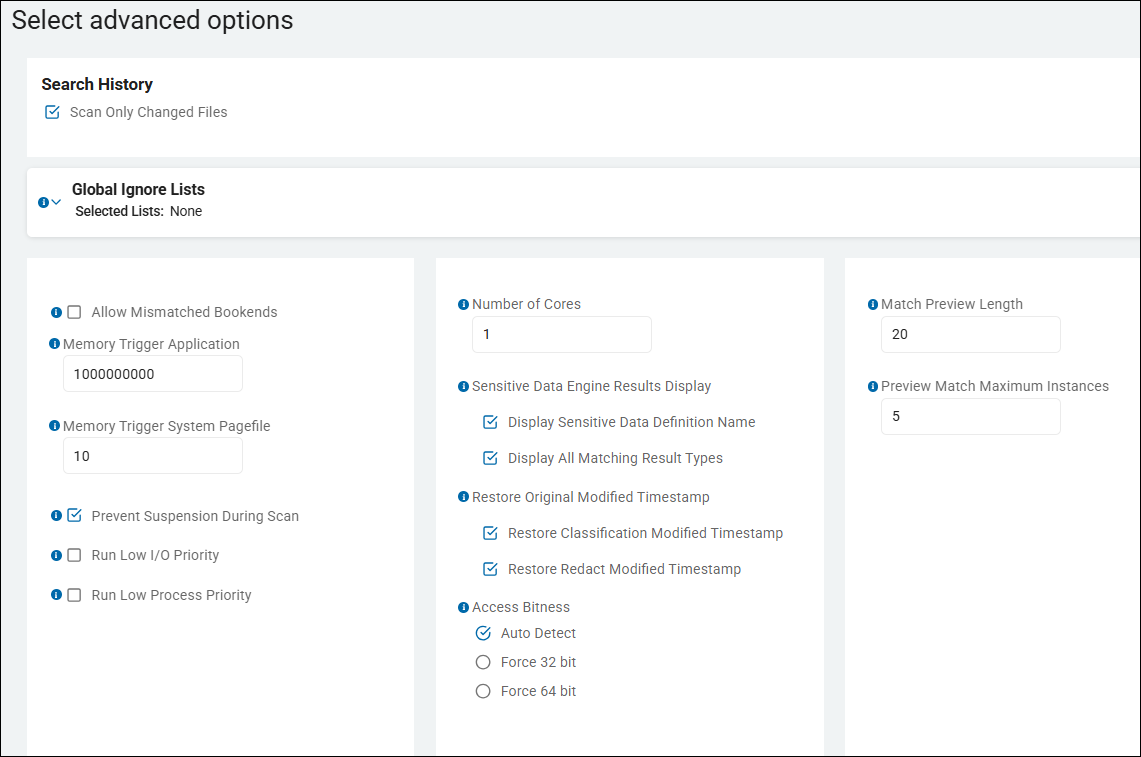
When you create a new scan, approximately the 11th step in the step-by-step wizard is the page Select advanced options.
-
Under Search History is the option Scan Only Changed Files
-
This is the Differential Scanning setting. See the image below.
New in version 13.4 is a feature called Differential Scanning.
Differential scanning:
- Is enabled by default for new scans using agents version 13.4 and later
- Scans only files that have changed since the last scan
- Scans all the files in your Target when the initial scan is performed
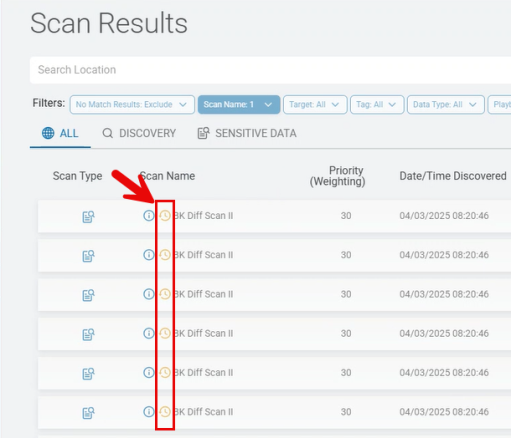
- When scans are complete, skipped (unscanned) files are marked with a yellow circular icon on the Scan Results page. See the image "Scan Results with Skipped Locations" below. Spirion Sensitive Data Platform did not detect any changes to these locations since the last scan.
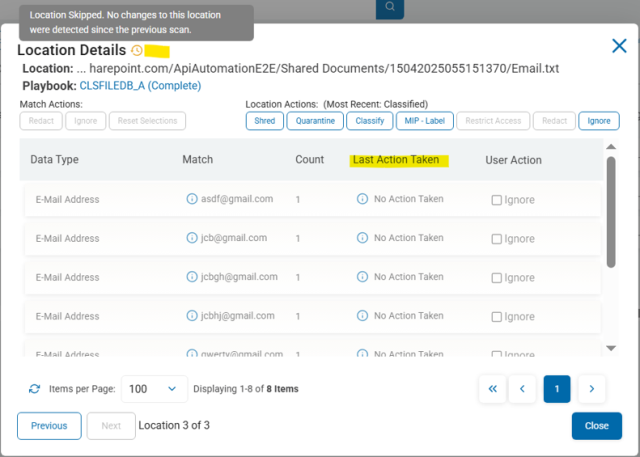
- Details of skipped locations: Open the skipped location from the Scan Results page for additional details. See the image "Skipped Location Details" below.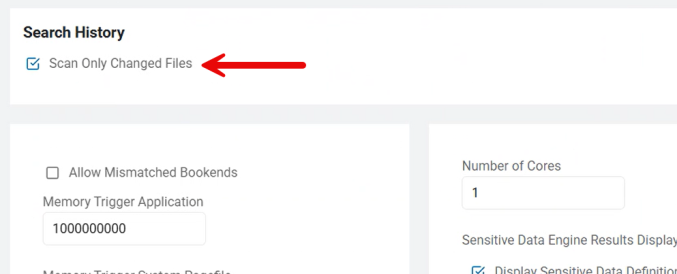
Email Drafts and Attachments
-
With Differential Scanning enabled (it is enabled by default), when scanning either Exchange or Gmail locations, emails in draft form as well as attachments to such emails are always scanned, regardless of their state of change. The emails and attachments are never marked to be skipped.
Impact of Classification
-
Important! With Differential Scanning is enabled (it is enabled by default), locations/files which are classified by Spirion Sensitive Data Platform during a scan are not marked for rescanning as the location/file has not been altered, and can therefore be skipped during the next scan, assuming no other changes are made.
Impact of Redaction
-
Important! Given that Differential Scanning is enabled (it is enabled by default), and sensitive information in locations/files are redacted by Spirion Sensitive Data Platform, then the locations/files are still marked for rescanning regardless of any other changes being made. Marking redacted files to be skipped by subsequent scans would result in playbook rules being unenforced.
Impact of AnyFind Definition Change
-
Important! If your Agent is updated and this includes a change to AnyFind logic (the AnyFind definition file changes) all existing Search History is invalidated.
Scan Results with Skipped Locations
-
Skipped locations on the Scan Results page are noted with a yellow, circular icon:

-
Spirion Sensitive Data Platform did not detect any changes to these locations since the last scan.
Skipped Location Details
-
Note the Location Details in the screenshot below and the details under the column Last Action Taken
Supported Sources:
Amazon S3
Box
Dropbox
Exchange
Exchange Online
Gmail
Google Drive
OneDrive
Local files and folders
Remote files and folders
SharePoint
SharePoint Online
Unsupported sources:
Any Database
BitBucket
OLEDB
ODBC
Website
How to Create a New Sensitive Data Scan
Procedure:
- From the Dashboard, navigate to Scans > All Scans.
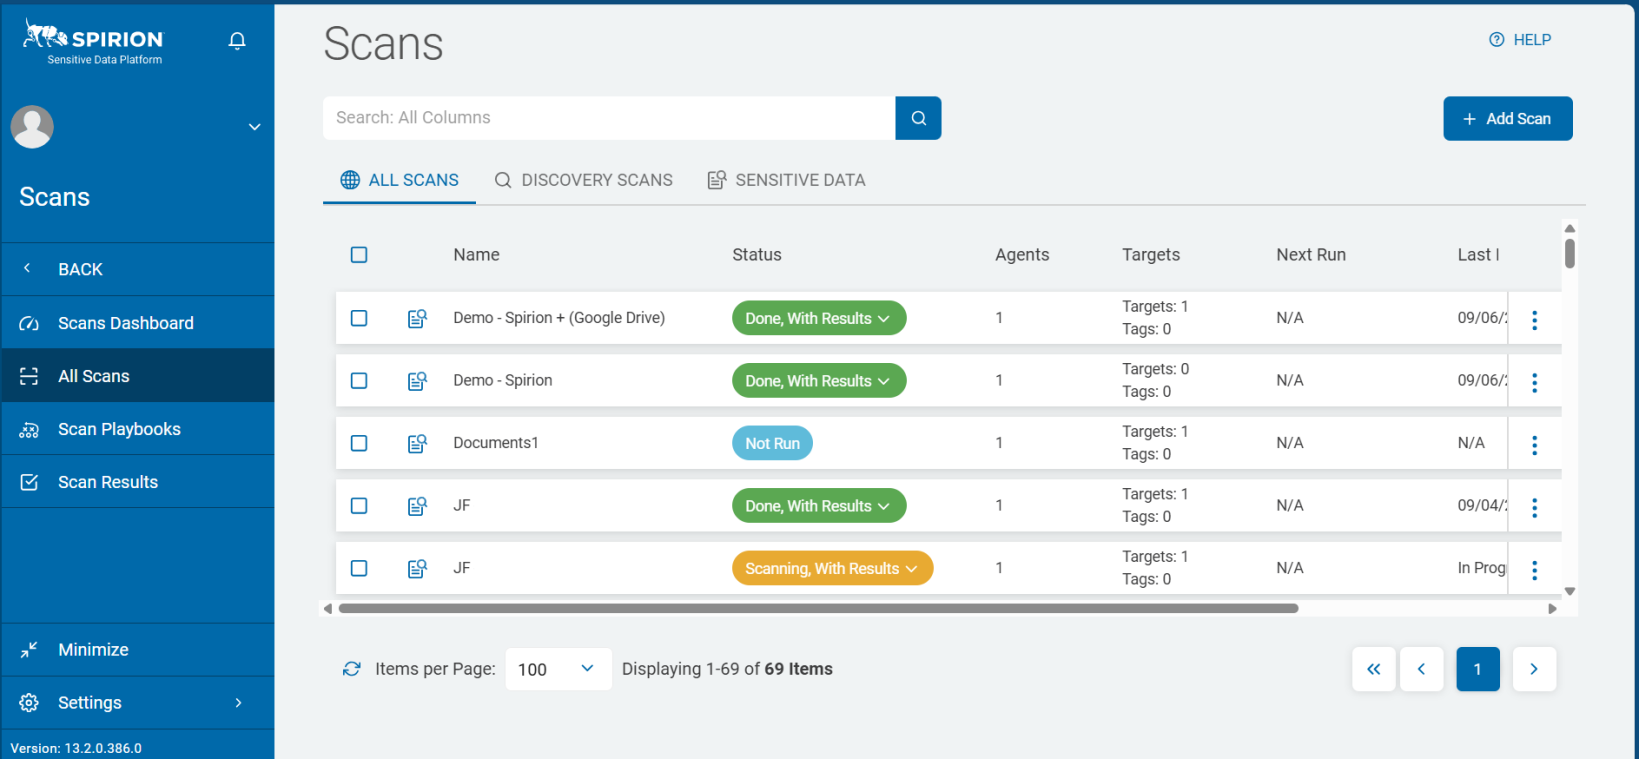
To create a new Sensitive Data Scan:
- In the top-right corner of the All Scans screen, click the Add Scan button.
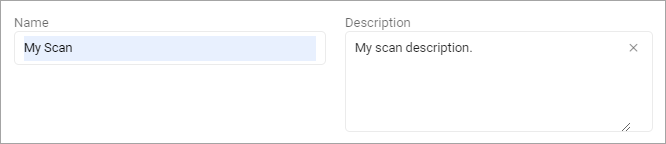
- On the next screen, fill in the Name and Description. The Description is optional.
- On the Select what type of scan to create screen, click Sensitive Data Scan. Select Next.

- On the Select a Playbook to apply to the scan screen, choose a Playbook from the list.

If the playbook you want is not listed, you can use the Search box to search for it.
To search for a specific Playbook, type the name of the Playbook in the search box and then select the search icon.
- On the Select the target type to scan, choose a Target type.
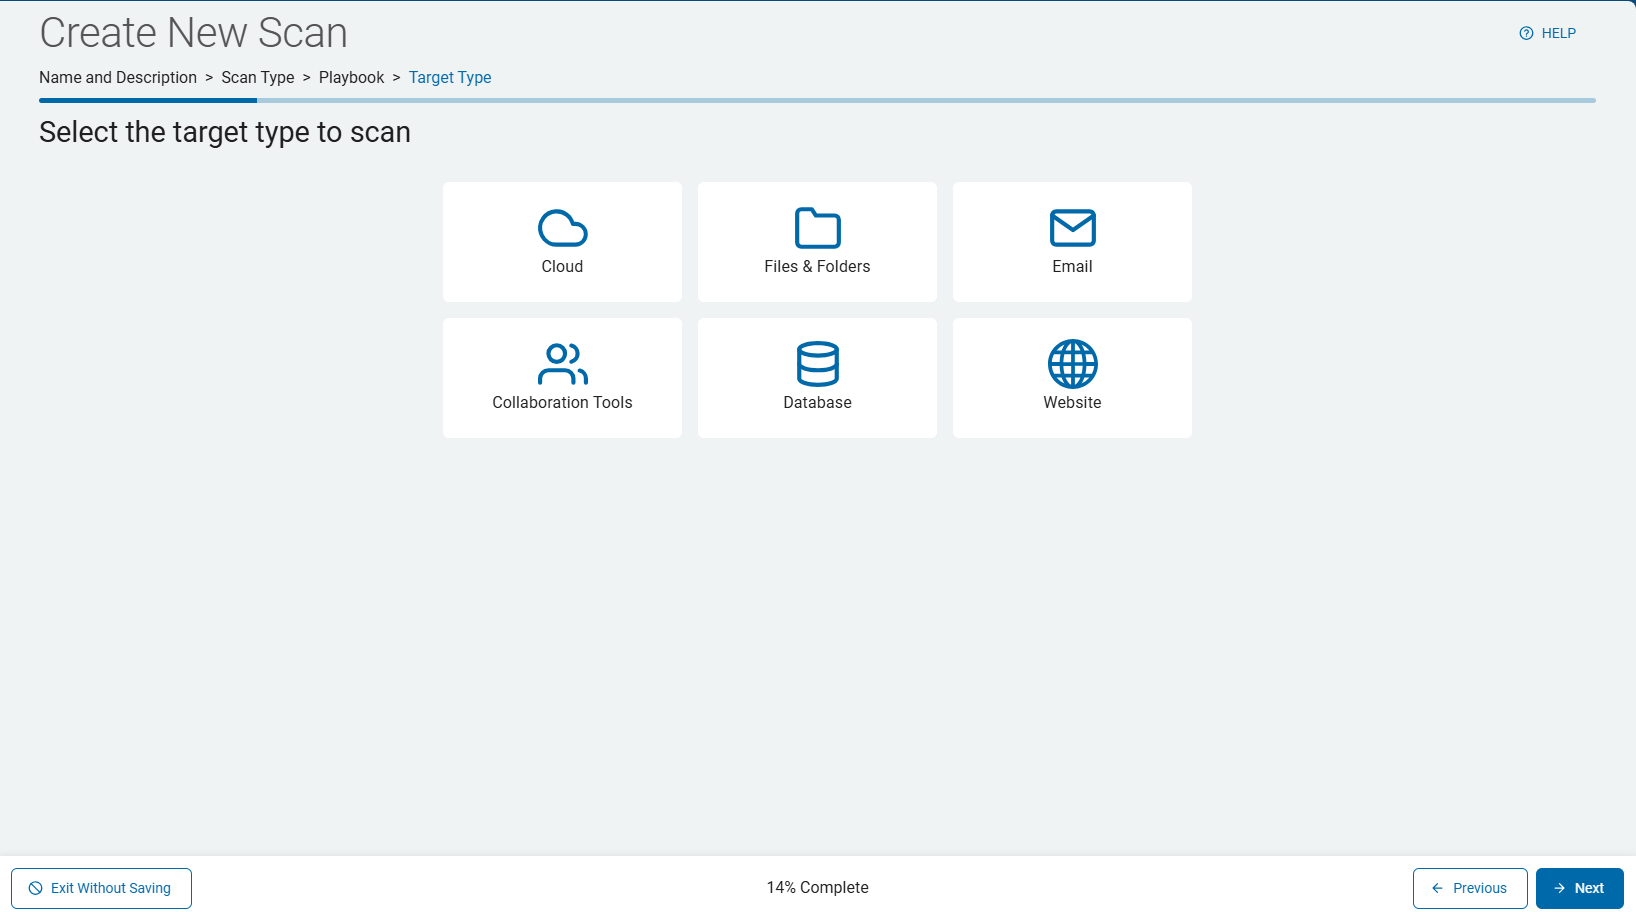
- Expand each of these sections for more information on Target types.
How to Create a Cloud Scan
Procedure:
- Click the Cloud tile.

- On the Select which cloud service to scan screen, select and click a cloud platform tile:
- Dropbox
- Google Drive
- Box
- OneDrive for Business
- Amazon S3

- Select the service and the Select the agent(s) to perform the scan screen opens.
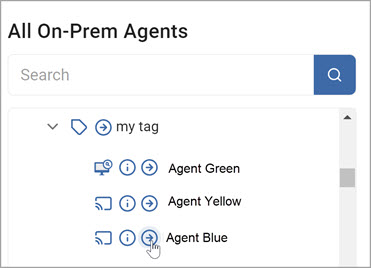
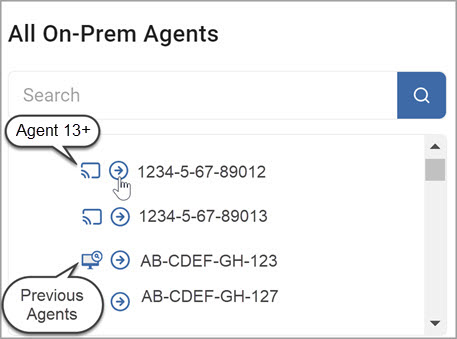
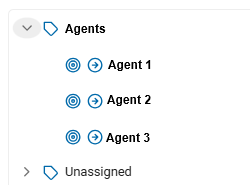
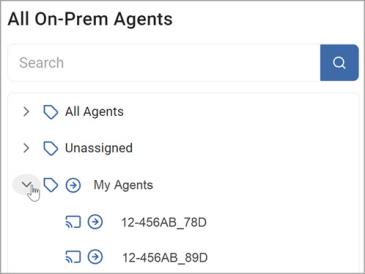
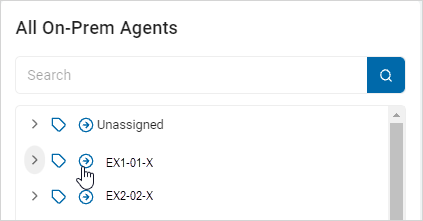
- From the All On-Prem Agents list, choose the agent(s) you want to use.
- To expand a section, click the chevron (>) icon.

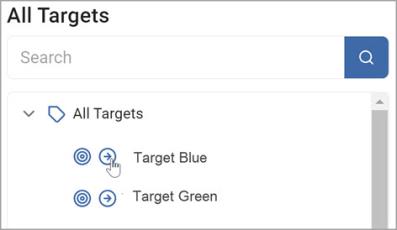
- To select an agent, click the arrow next to the agent name. This moves the agent over to the Selected On-Prem Agents field.
- To check the version of an agent, hover your mouse over the information icon to determine the version of the Agent.

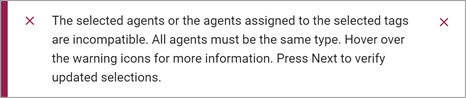
Note:Agent v13, Agent v13.1, Agent v13.2, and Legacy Agents (pre-version 13.0) cannot be combined.
If you select more than one version of the agents, you get an error message and are prompted to reselect your agents.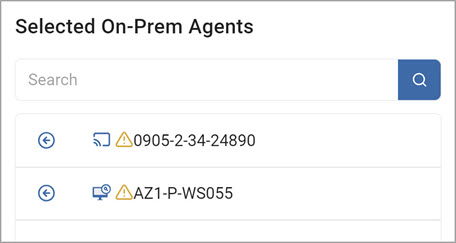
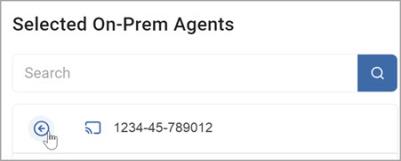
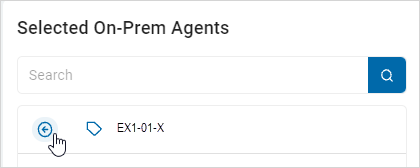
- To remove an agent from the Selected On-Prem Agents field, click the arrow next to an agent name in that field.

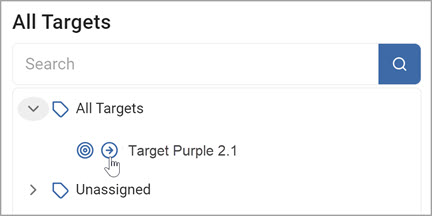
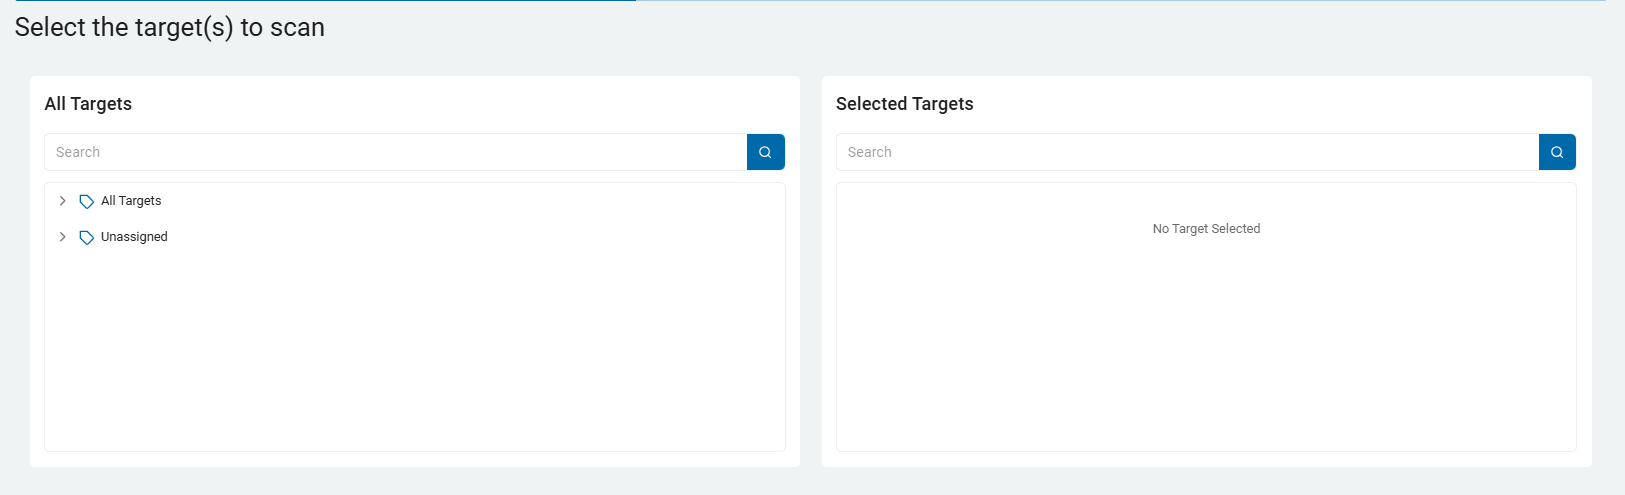
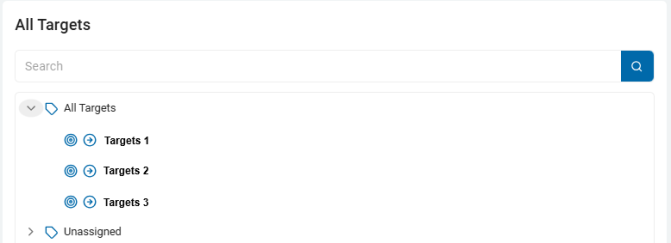
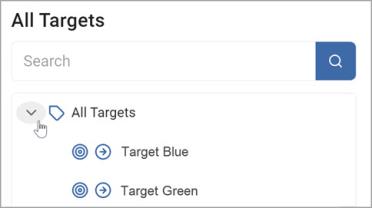
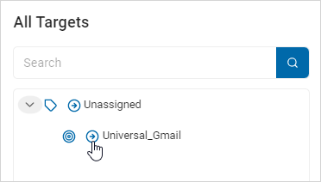
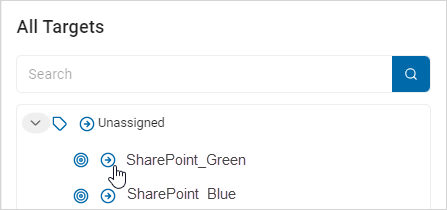
- On the Select Targets(s) to Scan screen, select one or more targets to scan.
- Expand the section and add a target.
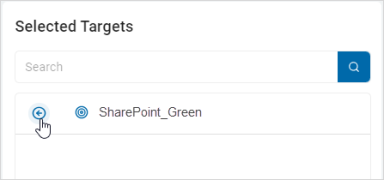
- To add a target, click the arrow next to its name and move it to the Selected Targets field.
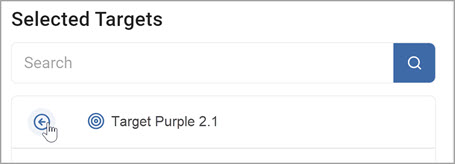
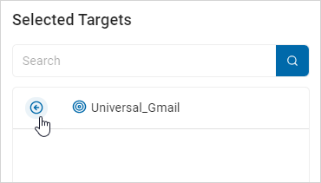
- To remove a target from the Selected Targets section, click the arrow next to the target name and move it back to the All Targets field.
Note: To create a new Target, see Working with Assets and Targets.
- Click Next to proceed, Previous to return to the previous screen, or Exit Without Saving
to discard. - On the Select Which User Accounts Would You Like to Scan screen:
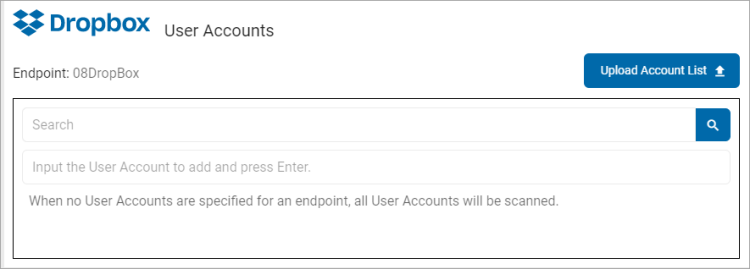
Note: Your cloud source brand is reflected on this screen.
However, the screen does not display for amazon S3 cloud services.Search: To search for a User Account, type the name in the box and click the Search icon or click Enter.
Input the User Account to add and press Enter: Type the user account name and click Enter.
Upload Account List: To upload a list of accounts from your local computer, click the upload icon and locate the file on your local computer.
- Click Next to proceed, Previous to return to the previous screen, or Exit Without Saving
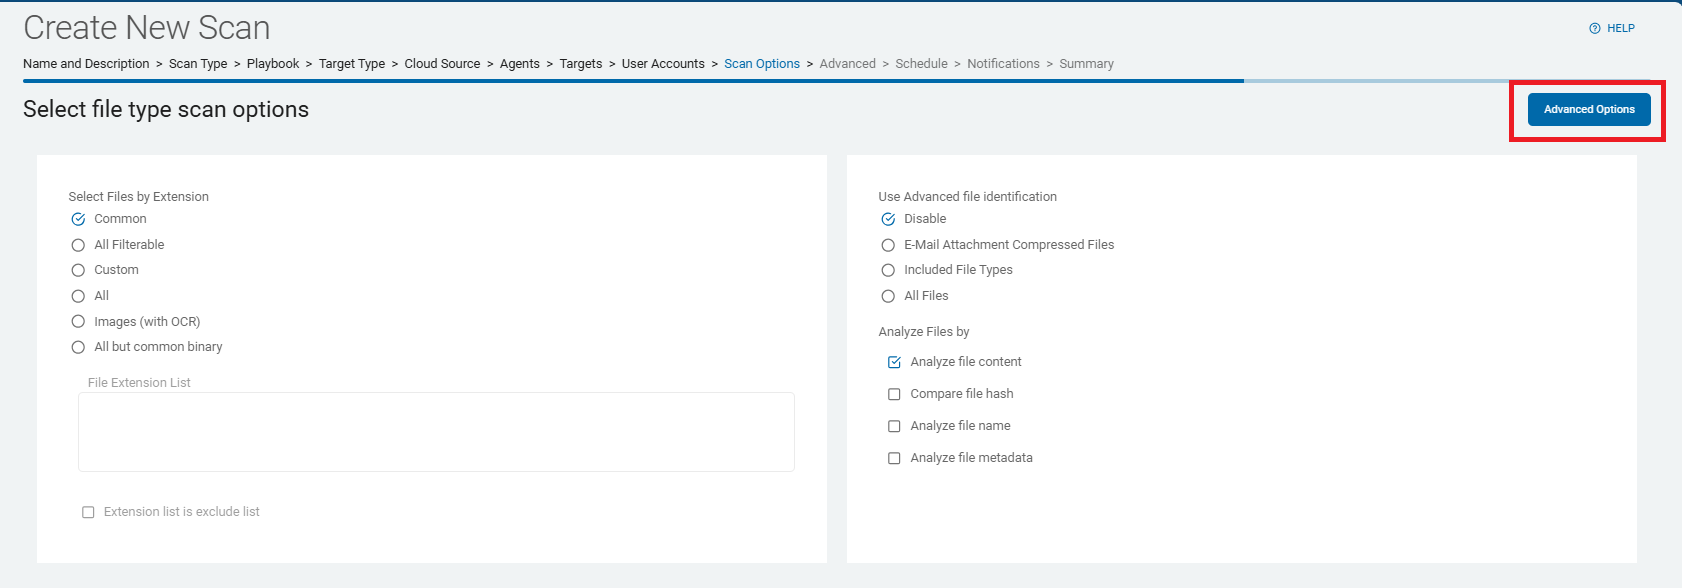
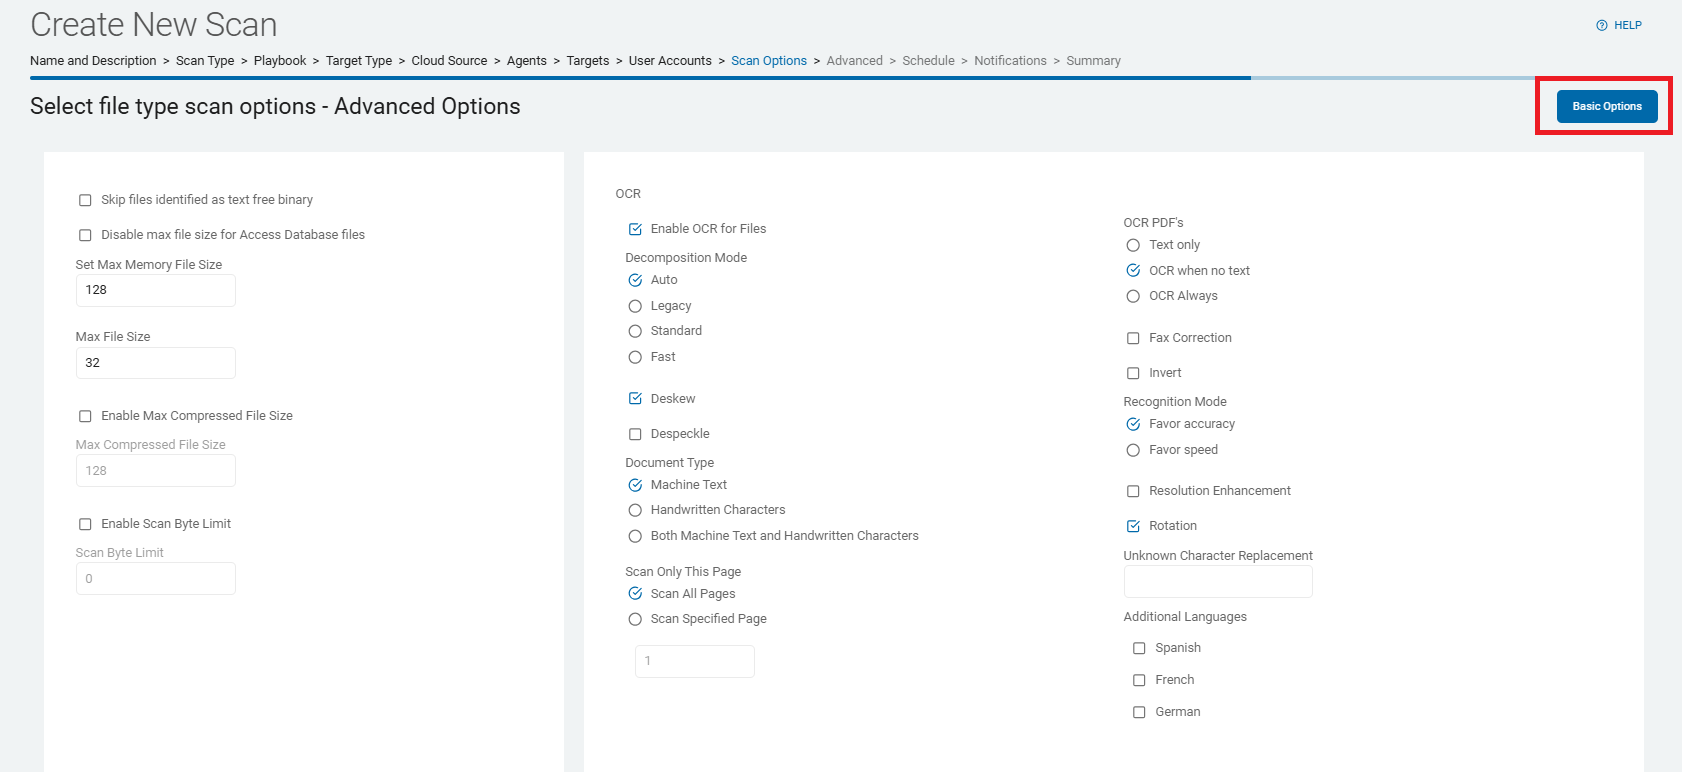
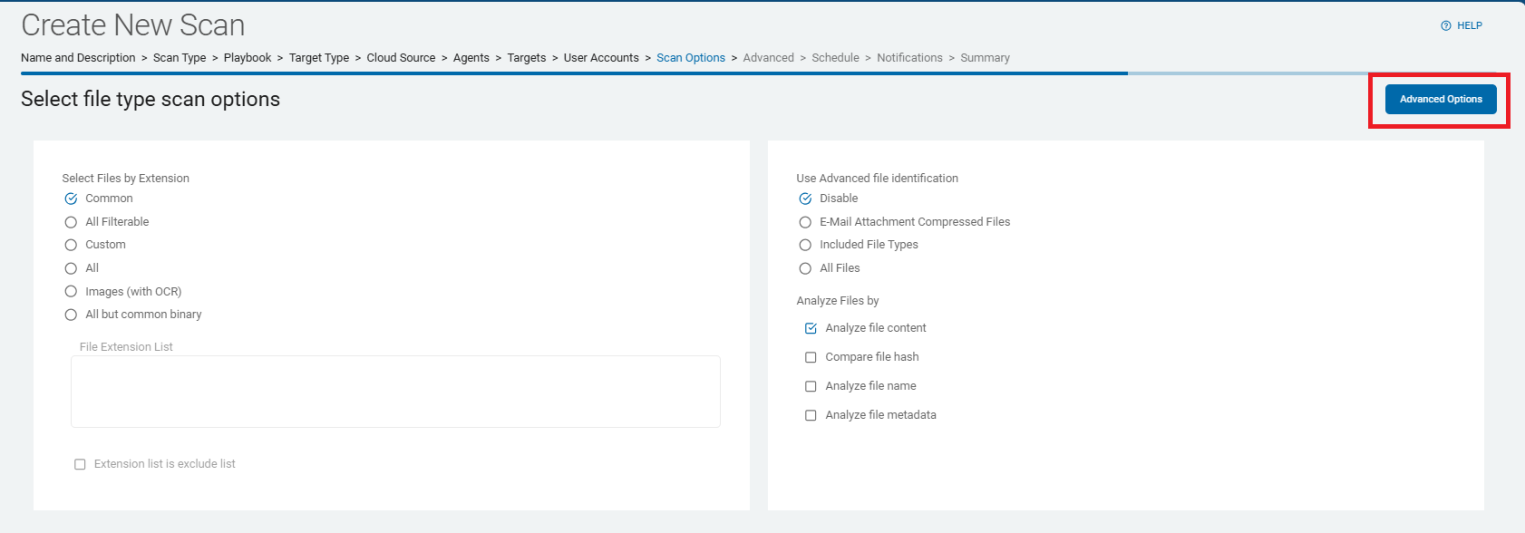
to discard. - On the Select File Type Scan Options screen, select options.
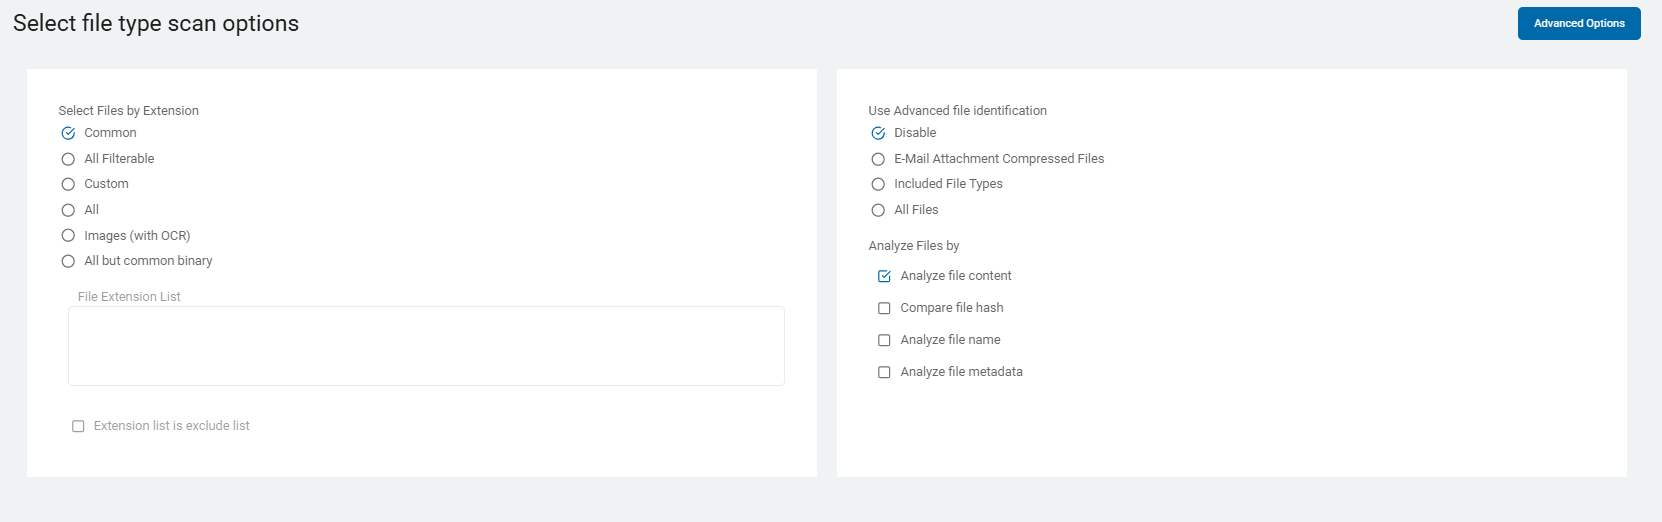
These options are described in Scan Options.
- If applicable, click the Advanced Options button in the top right corner of the screen to add additional options. Then click the Basic Options button to return.
- Click Next to proceed, Previous to return to the previous screen, or Exit Without Saving
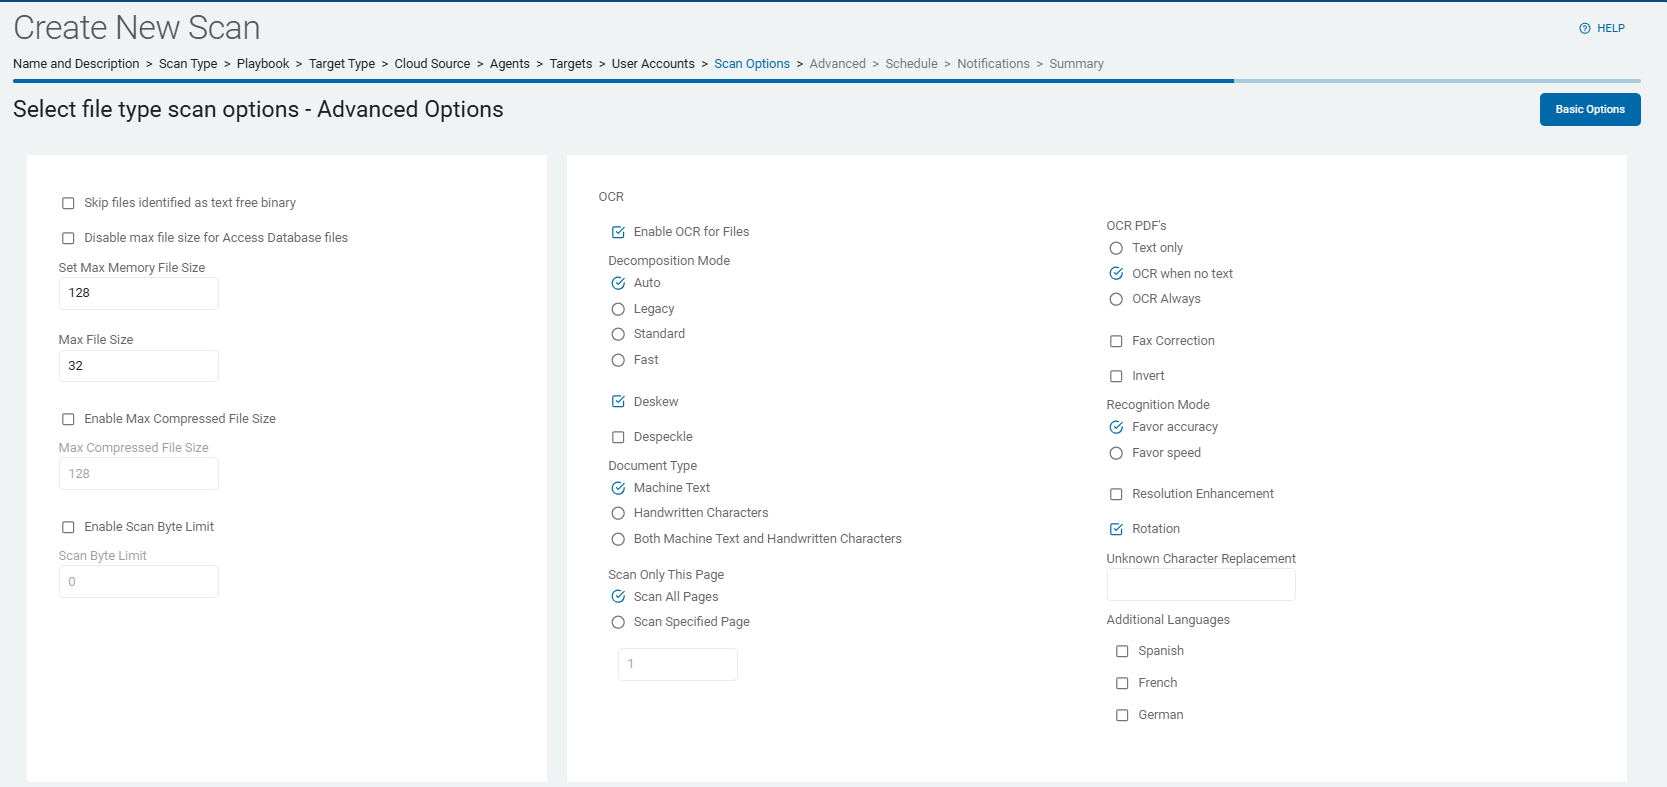
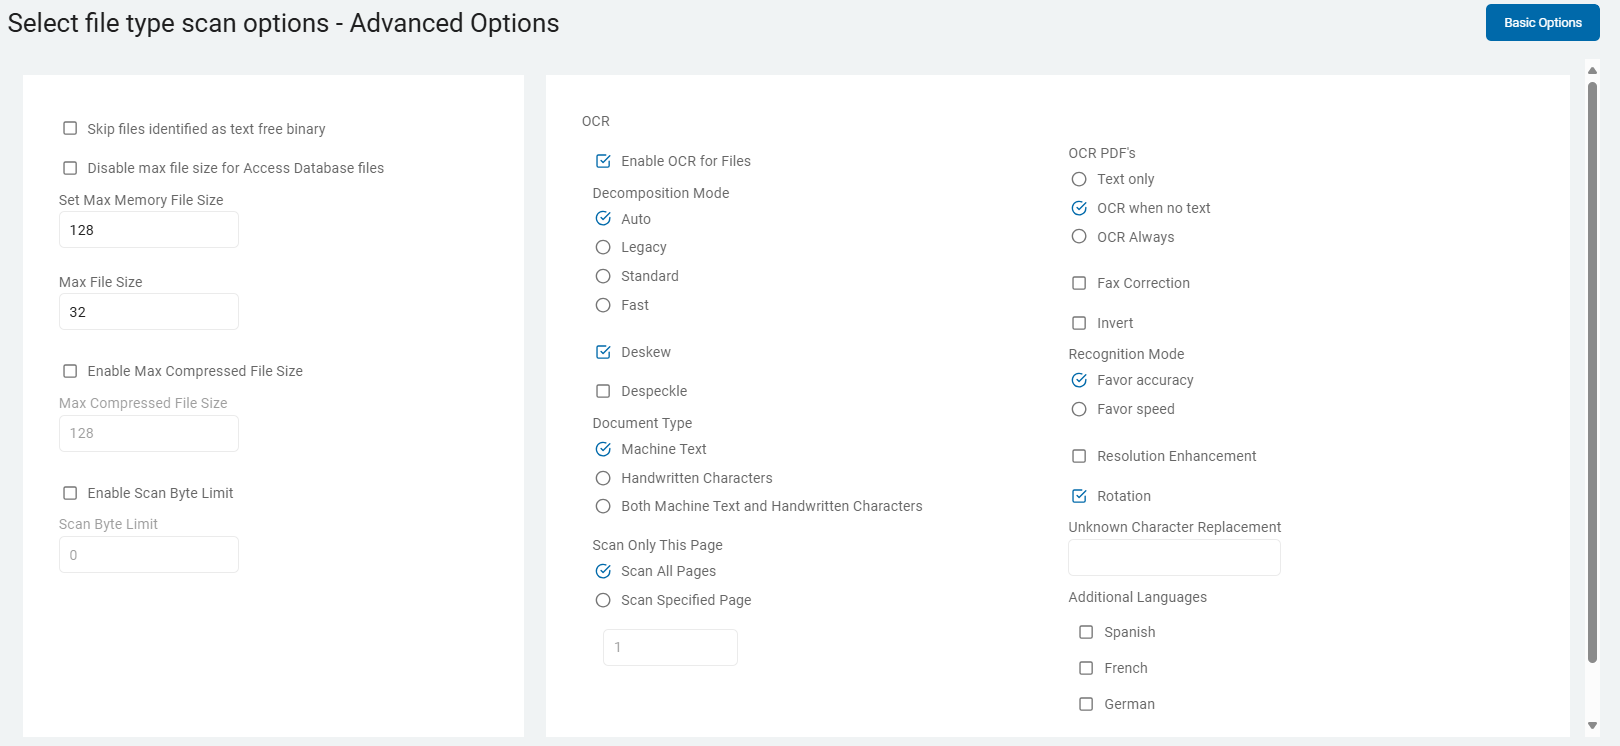
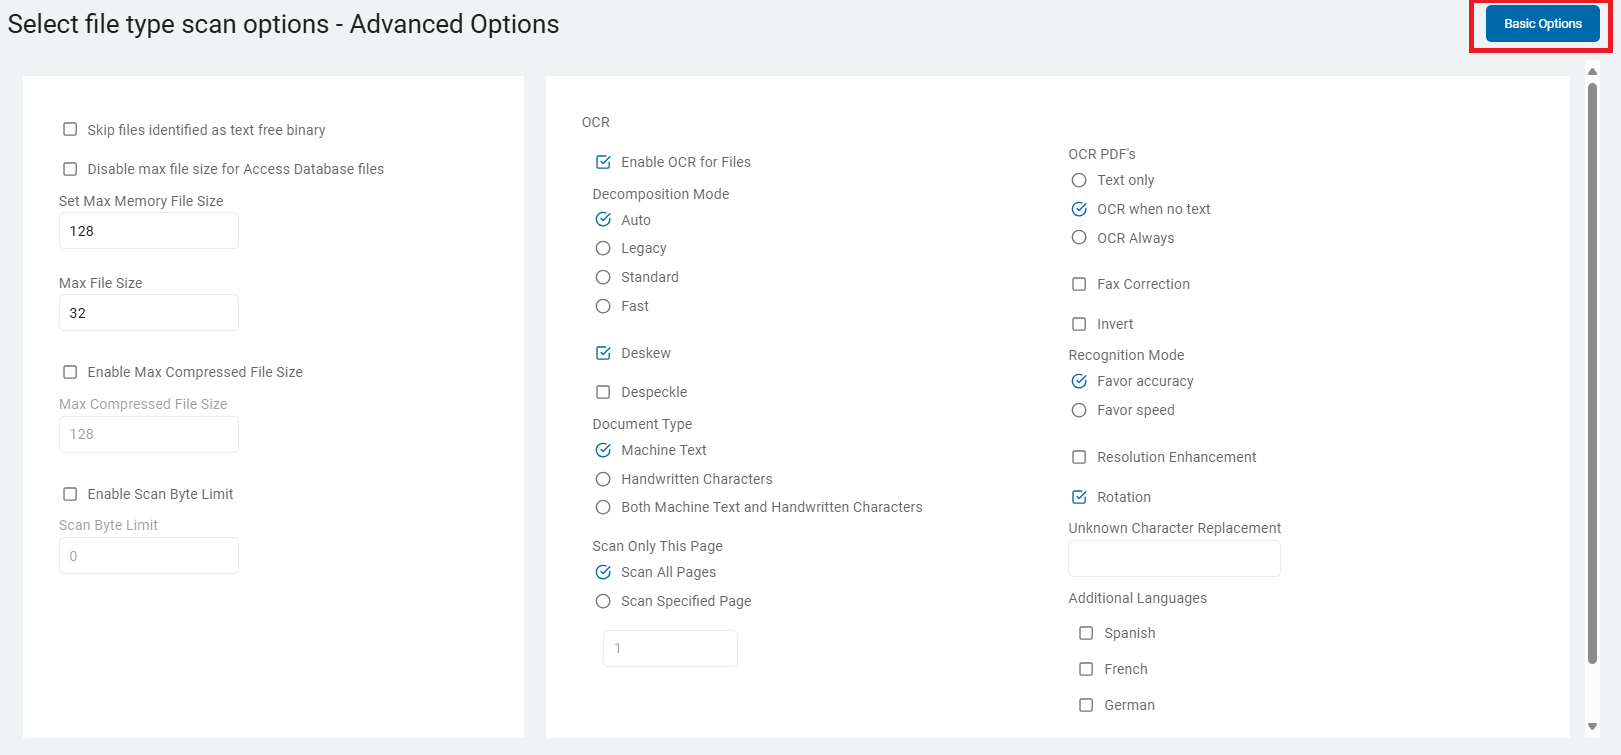
to discard. - On the Select file type scan options - Advanced Options screen, select options.
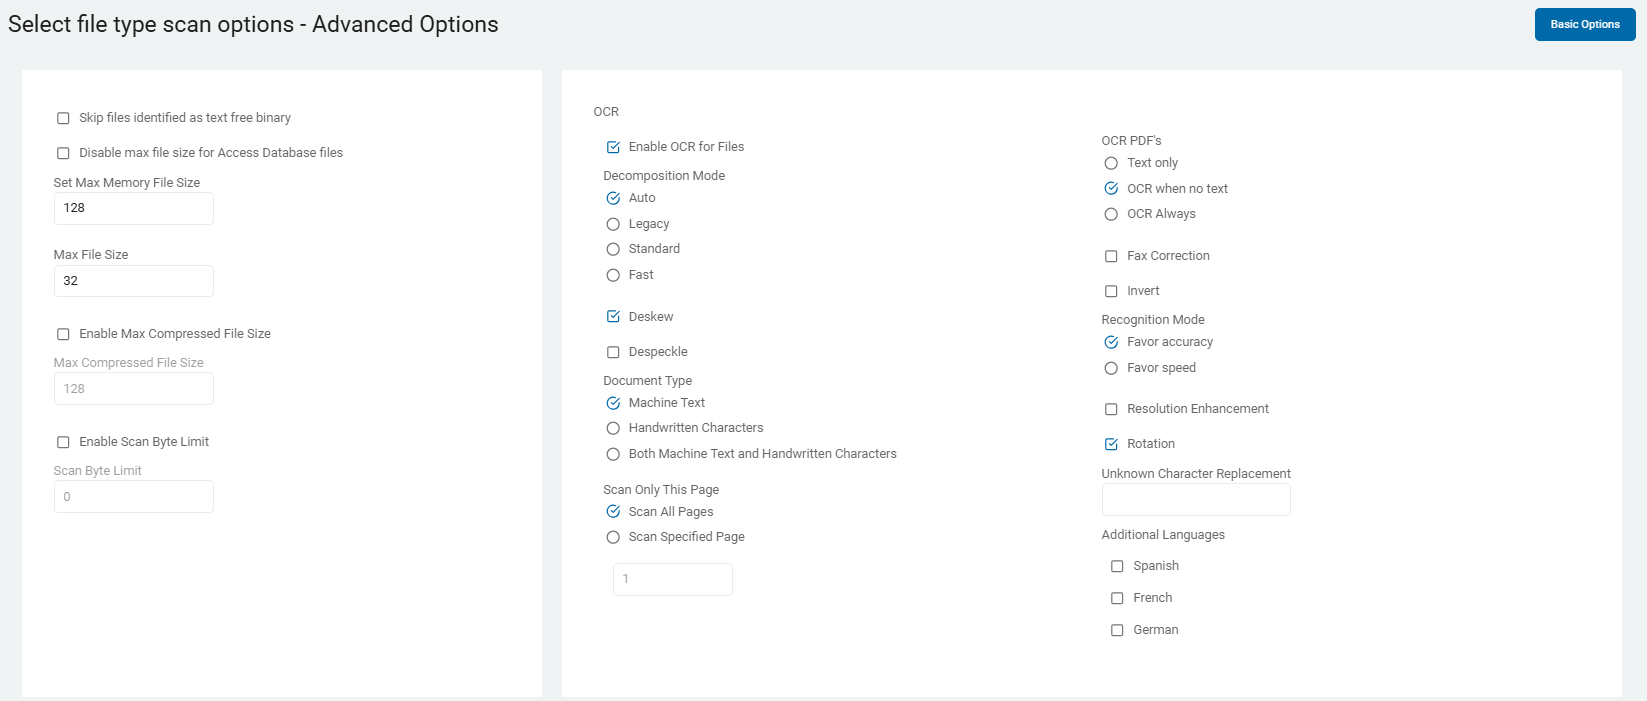
- These options are described and detailed in Scan Options.
- Click Next to proceed, Previous to return to the previous screen, or Exit Without Saving
to discard. - On the Select advanced options screen, select from the Advanced Options.

These options are described and detailed in Scan Options.
- Click Next to proceed, Previous to return to the previous screen, or Exit Without Saving
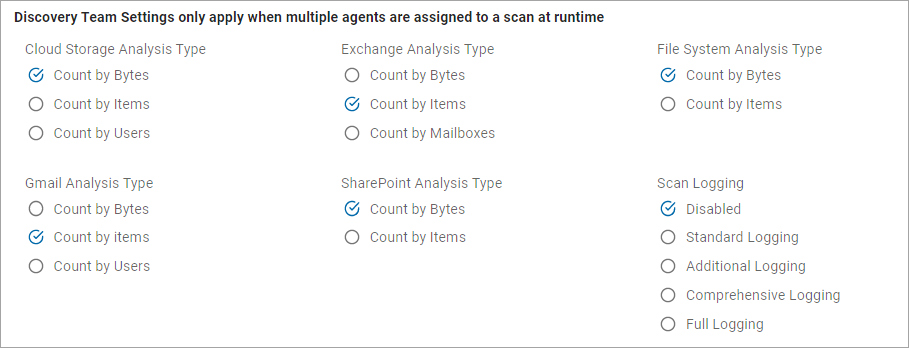
to discard. - On the Select Discovery Team settings screen, select from these options:
Note: This screen only displays when multiple On-Prem agents are selected.

Agents version 13.0+
Ensure the following ports are open:
-
Port 5672: Use these settings:
-
Open for Inbound TCP communication on the Discovery Agent.
-
Open for Outbound TCP communication on ALL. other agents involved in the same scan to the Discovery Agent.
NOTE: This communication is for reading and writing information to the message queue.
-
-
Port 15672: Use these settings:
-
Open for Inbound TCP communication on the Discovery Agent.
-
Open for Outbound TCP communication on ALL other agents involved in the same scan to the Discovery Agent.
NOTE: This is for the Message Queue Management Interface and API.
-
Agent version 13.2+
Ensure these ports are open.
-
Ports 5671 & 5672: Use these settings:
-
Open for Inbound TCP communication on the Discovery Agent.
-
Open for Outbound TCP communication on ALL other agents involved in the same scan to the Discovery Agent.
NOTE: This communication is for reading and writing information to the message queue.
-
-
Ports 15671 & 15672: Use these settings:
-
Open for Inbound TCP communication on the Discovery Agent.
-
Open for Outbound TCP communication on ALL other agents involved in the same scan to the Discovery Agent.
NOTE: This is for the Message Queue Management Interface and API.
-
-
Discovery Agent: Select an agent from the drop-down list.
Note: Distributed scans use the assigned discovery agent to conduct location discovery and provide a queue for all other agents to be assigned locations for scanning.
While the Discovery Agent can be manually chosen, it is recommended that you use the preferred Discovery Agent.
-
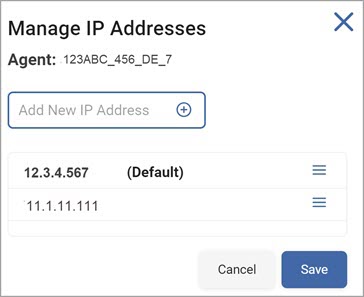
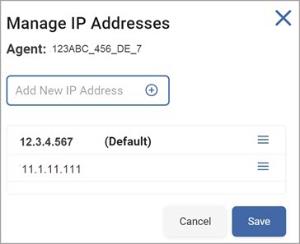
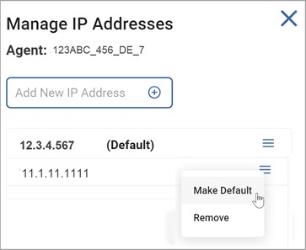
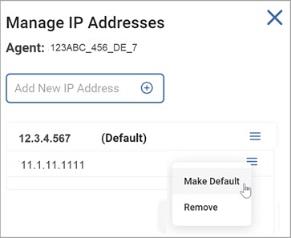
Configure Agent IPs: If your organization requires it, you can set a specific IP address.
-
Click Configure Agent IP's.
-
In the Add New IP Address window, type the new IP address and click the plus (+) icon.
-
Hover over the new IP address options menu and click Make Default.
-
Click Save to apply or Cancel to discard.

For Agent version 13.0 and legacy Agents, use the options in the graphic below.
These options are described and detailed in Scan Options.
- Click Next to proceed, Previous to return to the previous screen, or Exit Without Saving
to discard. - The next screen is Select the scan schedule.
- Click on How to Set the Date and Time of a Scheduled Scan to see how to set the date, time, and /or recurrence for a scan.
- Click Next to proceed, Previous to return to the previous screen, or Exit Without Saving
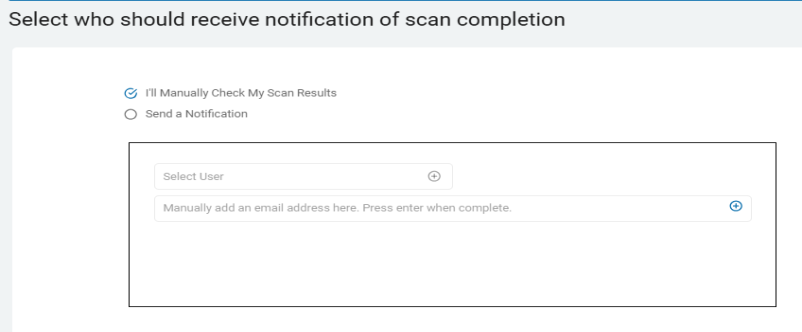
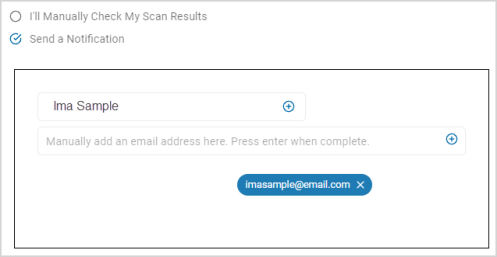
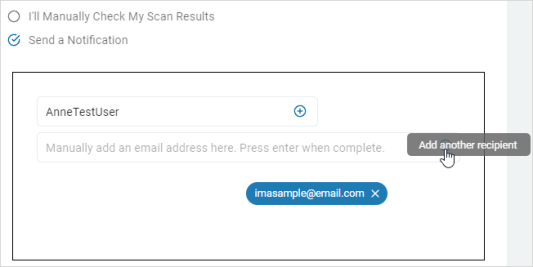
to discard. - On the Who should receive notification of scan completion screen, select how to send email notifications:
- I'll Manually Check My Scans Results
- Send An Email Notification

- Select a user from the drop-down list.
- Type an email address in the entry field and click Enter.
- To add additional email addresses, click the plus (+) icon and type the email addresses in the entry field.

- Click Next to proceed, Previous to return to the previous screen, or Exit Without Saving
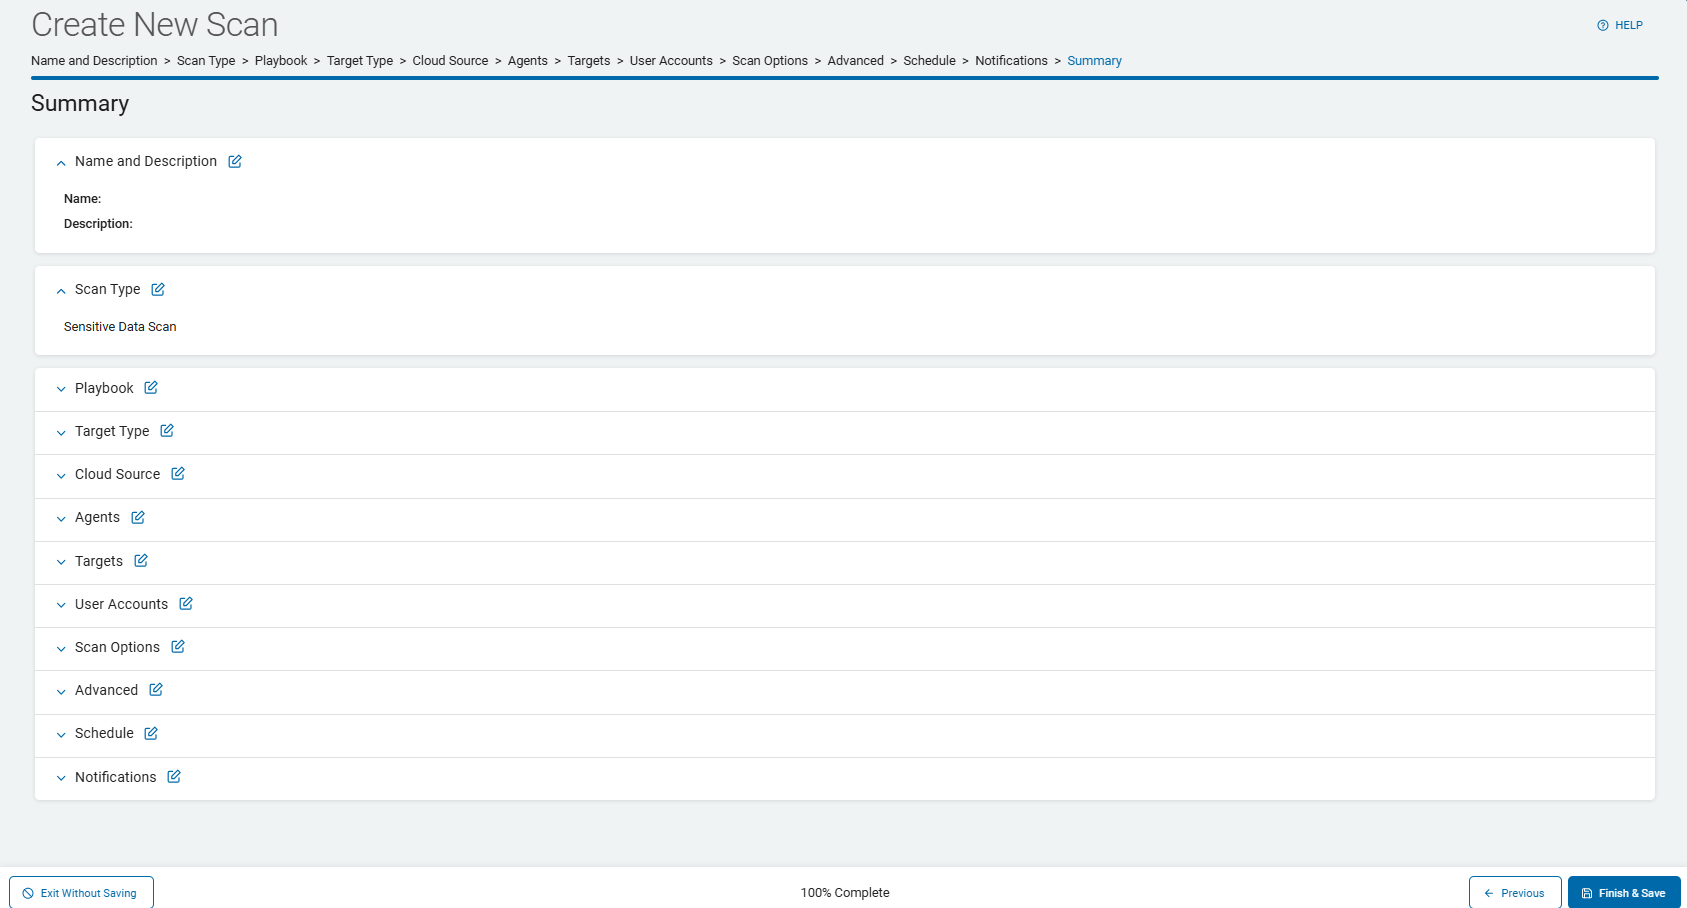
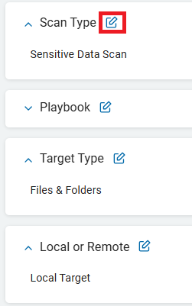
to discard. - On the Summary screen, select the chevron (>) to open and review your scan settings.
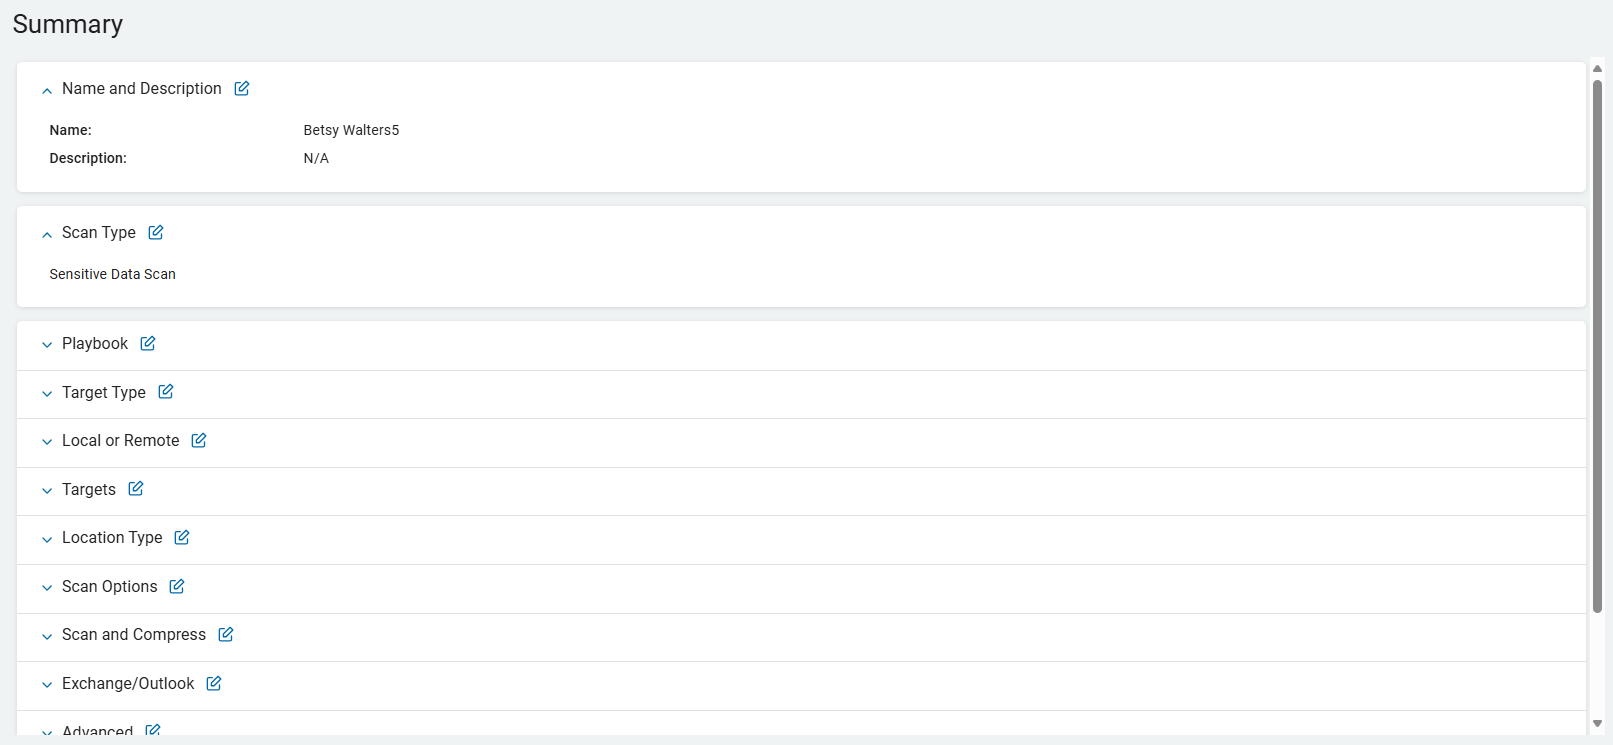
- Use a edit icon link to jump to a specific screen to edit a setting.

- Click Finish & Save to add the new Scan, Previous to return to the previous screen, or Exit Without Saving to discard.
How to Create a Files & Folders Scan
Use the steps below to create a files and folders scan.
- Click the Files & Folder tile.

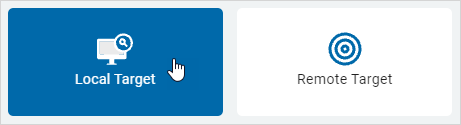
- Click a target type. For this example select Local Target.
Local Target
Procedure:
-
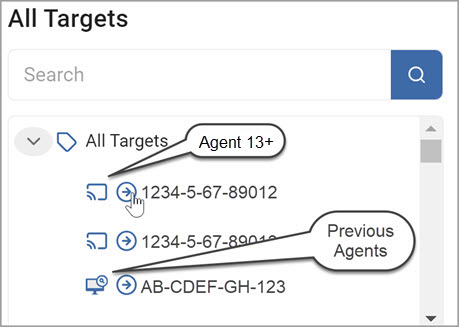
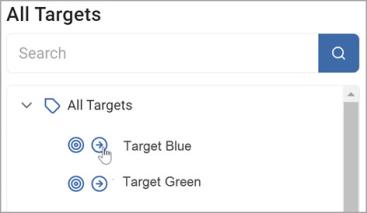
On the Select the target(s) to scan screen, click the chevron (>) next to one of the listed targets to expand the list in the All Targets section.
-
To add a target from the All Targets to the Selected Targets field, click the arrow next to the target.
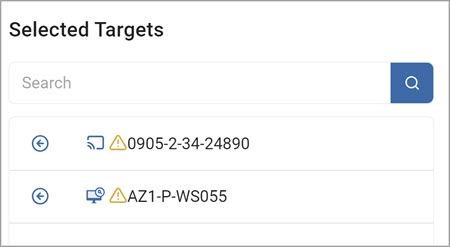
-
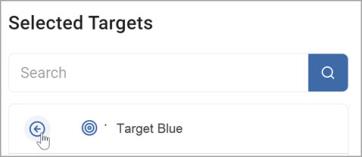
To move a target from the Selected Targets to the All Targets field, click the arrow next to the Target.
Note: Agent v13, Agent v13.1, Agent v13.2, and Legacy Agents cannot be combined.
If you select more than one version of the Targets, you receive an error message and are prompted to reselect your targets.
- Click Next to proceed, Previous to return to the previous screen, or Exit Without Saving
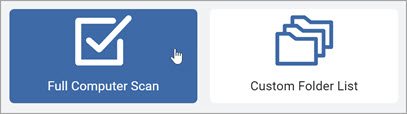
to discard. - On the Select the search location type screen, select a location type:
- Full Computer Scan
- Logged in User's Directory
- Cloud Storage Folders
- All Removable Drives
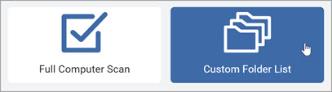
- Custom Folder List
- Select one:
- Create a new Full Computer
- Logged in User's Directory
- All Removable Drivers Scan

- For this example, select Full Computer Scan.
- On the Select file type scan options screen choose from the displayed Basic Options.
These options are described in Scan Options.
- If applicable, click Advanced Options button in the upper, right corner of the screen.
- Click the button again to return to the Basic Options screen.
- Click Next to proceed, Previous to return to the previous screen, or Exit Without Saving
to discard. - On the Select file type scan options - Advanced Options screen, choose from the displayed Advanced Options.
- These options are described and detailed in Scan Options.
- Click Next to proceed, Previous to return to the previous screen, or Exit Without Saving
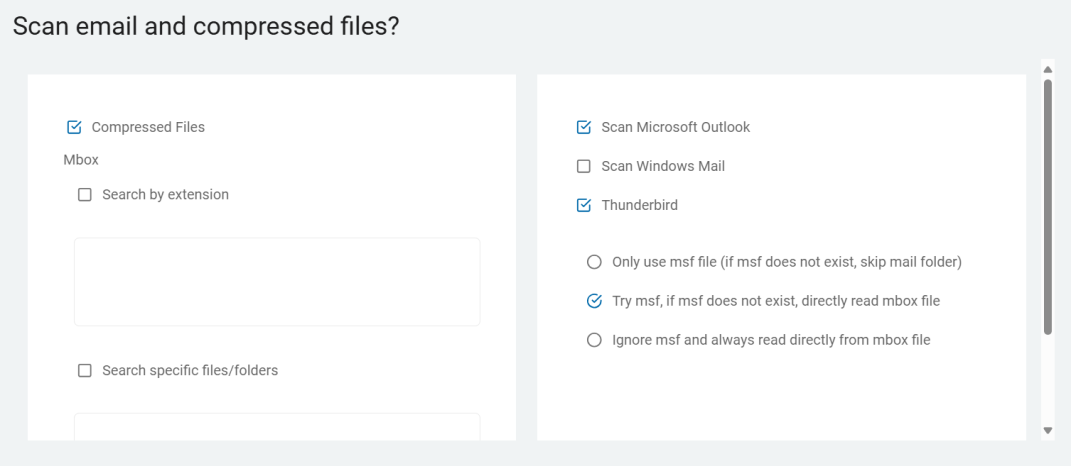
to discard. - On the Scan email and compressed files? screen, choose from the displayed options.
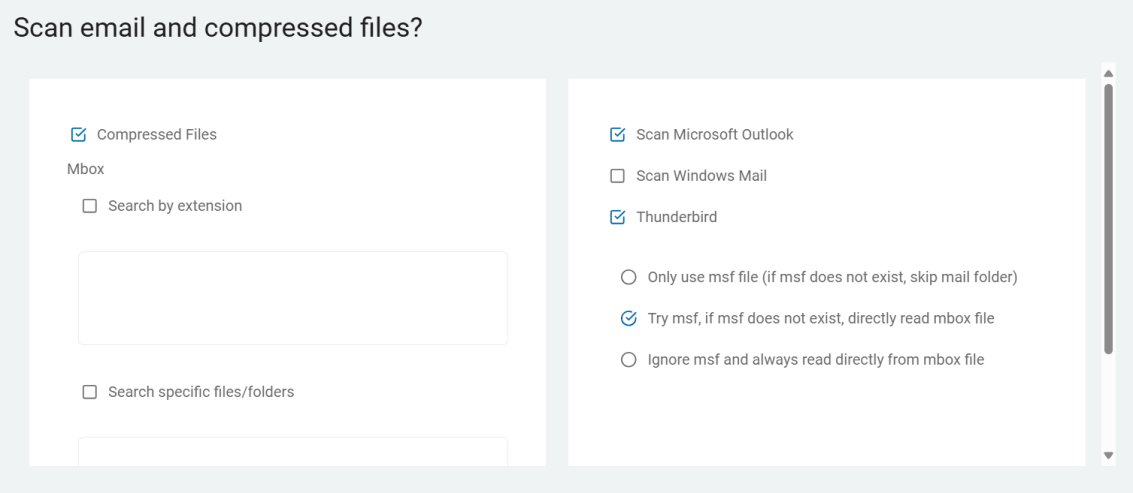
These options are described and detailed in Scan Options.
- Click Next to proceed, Previous to return to the previous screen, or Exit Without Saving
to discard. - On the Select Exchange / Outlook options screen, the available options are displayed.
- Click Next to proceed, Previous to return to the previous screen, or Exit Without Saving
to discard. - The Select advanced options screen, provides additional advanced options.
The Scan Only Changed Files option is enabled (checked) by default
This causes Spirion Sensitive Data Platform to skip (not scan) any files which have not changed since the last scan was performed. See Differential Scanning.
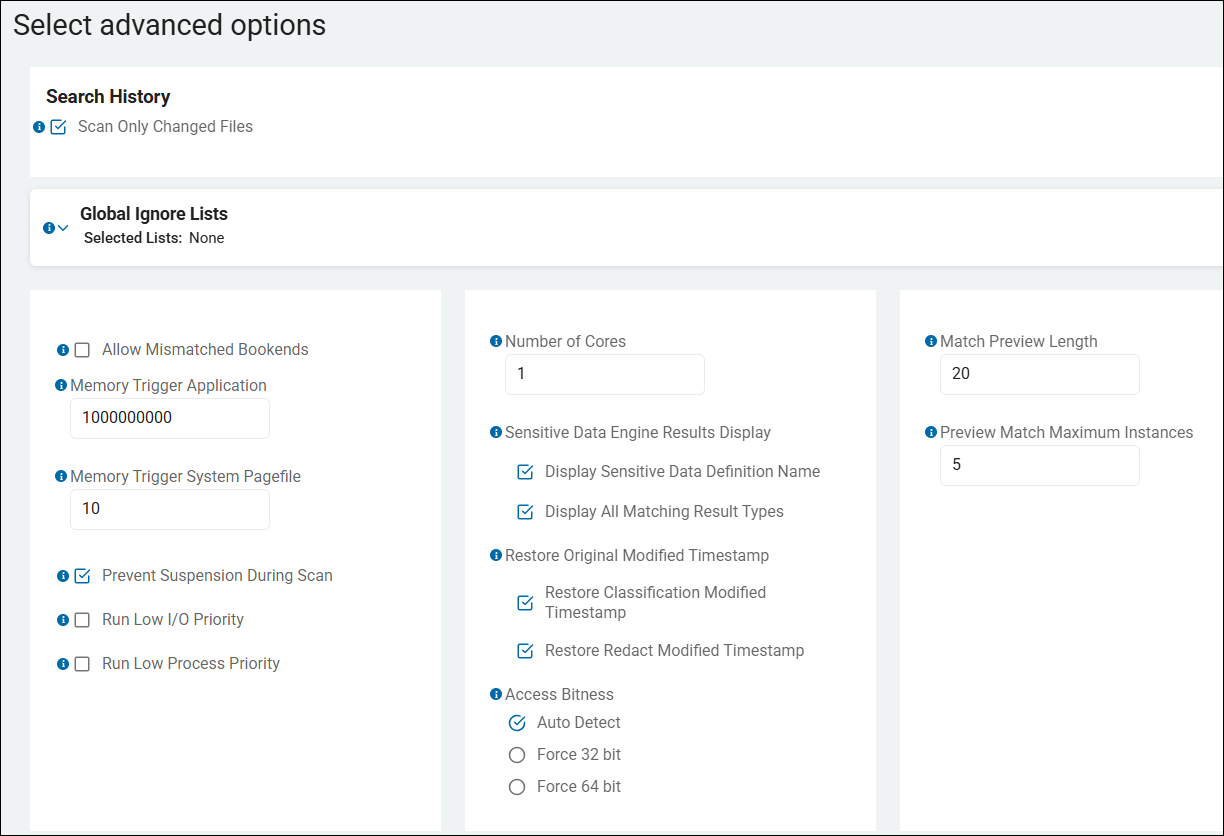
Global Ignore Lists - This option controls Global Ignore Lists.
Note that any user who is creating or editing a Sensitive Data scan (using the "Create New Scan" wizard, for example) can view and select any of the available Global Ignore Lists shown on the "Select advanced options" page.
To select a Global Ignore List for your scan to use (to ignore specific sensitive data matches or data match types), expand the Global Ignore List section and check the checkbox next to the appropriate Global Ignore List.
Search for the Global Ignore List or scroll down to find it, if necessary
Global Ignore Lists are available to be added to any scan. They do not apply to all scans by default.
For more information see Global Ignore Lists.

These options are described and detailed in Scan Options.
These options are described and detailed in Scan Options.
- Click Next to proceed, Previous to return to the previous screen, or Exit Without Saving
to discard. - The next screen is the Select the scan schedule screen. To set up date, time, and / or recurrence for a scan, see How to Set the Date and Time of a Scheduled Scan.
- Click Next to proceed, Previous to return to the previous screen, or Exit Without Saving
to discard. - On the Who should receive notification of scan completion screen, select how to send email notifications.
-
I'll Manually Check My Scans Results
-
Send An Email Notification
- Select a user from the drop-down list. Type an email address in the entry field and click Enter.
- To add additional email addresses, click the plus (+) icon and type the email addresses in the entry field.
- Click Next to proceed, Previous to return to the previous screen, or Exit Without Saving
to discard. - On the Summary screen, select the chevron (>) to open and review your scan settings.
- Use the edit
 icon links to jump to a specific screen to edit a setting.
- Click Finish & Save to add the new Scan, Previous to return to the previous screen, or Exit Without Saving to discard.
Custom Folder List

Procedure:
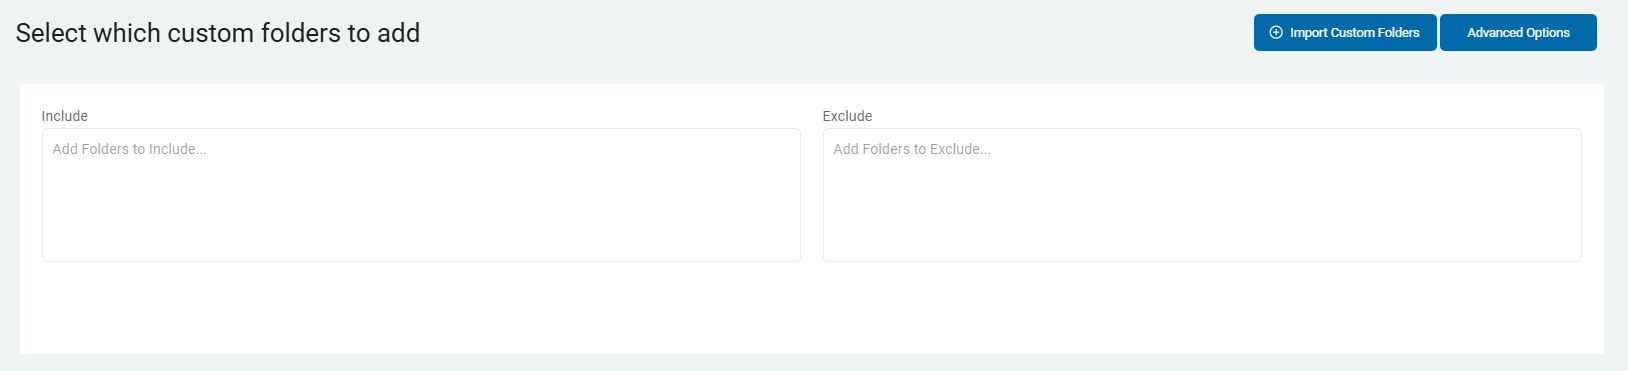
- On the Select which custom folders to add screen, enter the folders to include or exclude.
- Include: Type the folder(s) to include, one per line.
- Exclude: Type the folder(s) to exclude, one per line.
Note: You must include or exclude at least one folder.
-
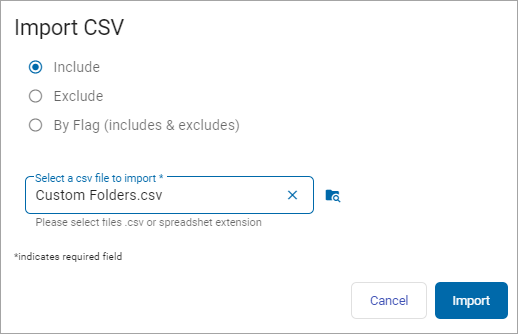
Import Custom Folders: Upload a .csv file of custom folder types.
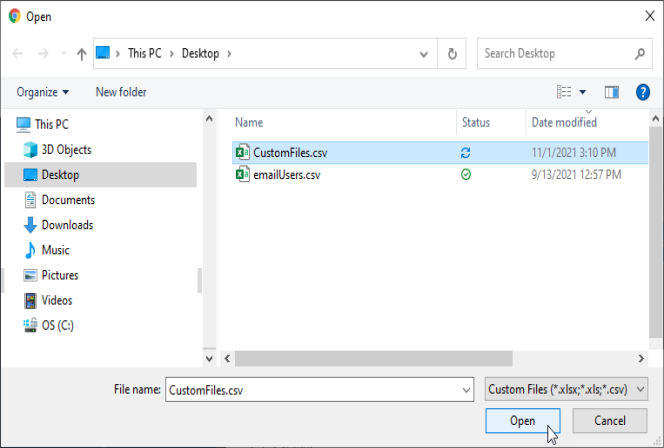
- Click Import Custom Folders. Navigate to the .csv folder to import from your computer.
- In the Import CSV window, select:
- Include
- Exclude
- By Flag (includes & excludes)
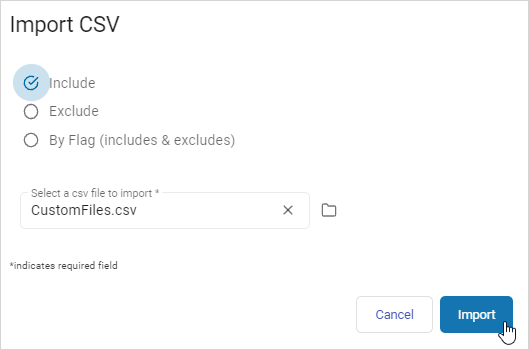
- Click Import to import the file or Cancel to discard.
- In the upper, right corner of the screen, click Advanced Options button.
- You can click the button again to go back to the previous screen.
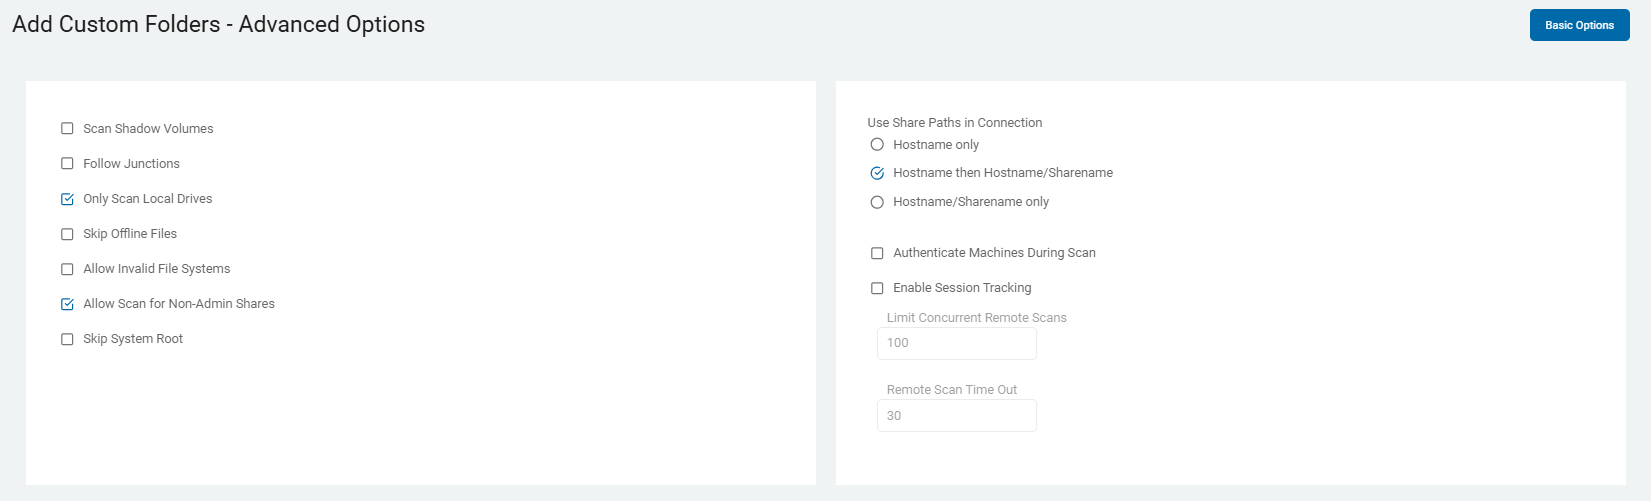
- The Add Custom Folders - Advanced Options screen opens. Additional options are displayed.
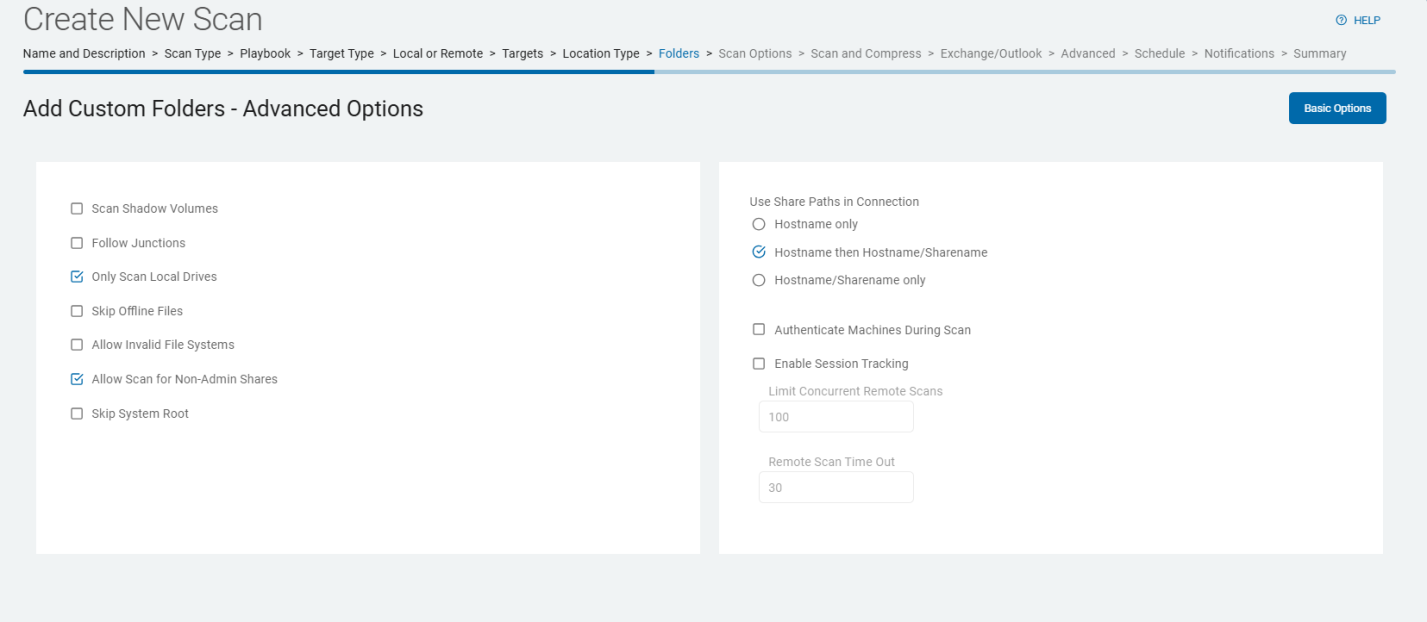
These options are described and detailed in Scan Options.
- Click Next to proceed, Previous to return to the previous screen, or Exit Without Saving
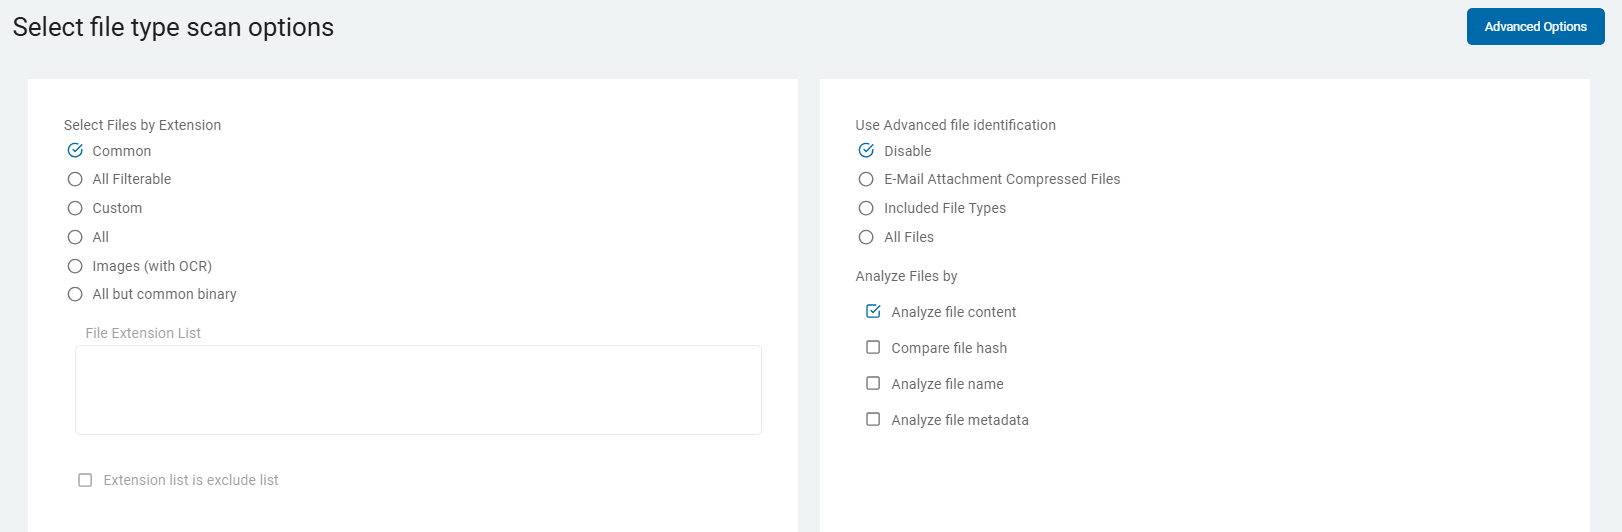
to discard. - The Select file type scan options screen displays Basic Options.
- You can also click the Advanced Option button in the top, right corner of the screen to access those options.
These options are described and detailed in Scan Options.
- Click Next to proceed, Previous to return to the previous screen, or Exit Without Saving
to discard. - From the Basic Options screen select the Advanced Options button and the Select file type scan options - Advanced Options screen opens and displays additional options.
- You can select the button again to return to the Basic Options screen.
These options are described and detailed in Scan Options.
- Click Next to proceed, Previous to return to the previous screen, or Exit Without Saving
to discard. - On the Scan email and compressed files? screen, select from the displayed options.

These options are described and detailed in Scan Options.
- Click Next to proceed, Previous to return to the previous screen, or Exit Without Saving
to discard. - On the Select Exchange / Outlook options screen, select from the displayed options.
These options are described and detailed in Scan Options.
- Click Next to proceed, Previous to return to the previous screen, or Exit Without Saving
to discard. - On the Select advanced options screen, choose from the additional options.
These options are described and detailed in Scan Options.
- Click Next to proceed, Previous to return to the previous screen, or Exit Without Saving
to discard. - The next screen is Select the scan schedule.
- Click on to see How to Set the Date and Time of a Scheduled Scan how to set the date, time, and / or recurrence for a scan.
- Click Next to proceed, Previous to return to the previous screen, or Exit Without Saving
to discard. - On the Who should receive notification of scan completion screen, select how to send email notifications.
- I'll Manually Check My Scans Results
- Send An Email Notification
-
Select a user from the drop-down list and / or type an email address in the entry field and click Enter.
-
To add additional email addresses, click the plus (+) icon and type the email addresses in the entry field.
- Click Next to proceed, Previous to return to the previous screen, or Exit Without Saving
to discard. - On the Summary screen, select the chevron (>) to open and review your scan settings.
- Use the edit icon link to jump to a specific screen to edit a setting.
- Click Finish & Save to add the new Scan, Previous to return to the previous screen, or Exit Without Saving to discard.
Cloud Storage Folders
Procedure:
- On the Select a cloud storage folder to scan screen, select a cloud storage type to scan:
- Dropbox
- Google Drive
- box
- OneDrive for Business
- amazon S3

- On the Select file type scan options screen, Basic Options display.
These options are described and detailed in Scan Options.
- If applicable, click the Advanced Options button to add additional options or click the Basic Options button to return to the previous screen.
These options are described and detailed in Scan Options.
- Click Next to proceed, Previous to return to the previous screen, or Exit Without Saving
to discard. - On the Scan email and compressed files? screen, select from the displayed options.
These options are described and detailed in Scan Options.
- Click Next to proceed, Previous to return to the previous screen, or Exit Without Saving
to discard. - On the Select Exchange / Outlook options screen, select from the displayed options.
These options are described and detailed in Scan Options.
- Click Next to proceed, Previous to return to the previous screen, or Exit Without Saving
to discard. - On the Select advanced options screen, additional options display.

These options are described and detailed in Scan Options.
- Click Next to proceed, Previous to return to the previous screen, or Exit Without Saving
to discard. - The next screen is the Select the scan schedule screen. To set up date, time, and / or recurrence, see How to Set the Date and Time of a Scheduled Scan.
- Click Next to proceed, Previous to return to the previous screen, or Exit Without Saving
to discard. - On the Who should receive notification of scan completion screen, select how to send email notifications.
- I'll Manually Check My Scans Results
- Send An Email Notification
- Select a user from the drop-down list or type an email address in the entry field and click Enter.
- To add additional email addresses, click the plus (+) icon and type the email addresses in the entry field.
- Click Next to proceed, Previous to return to the previous screen, or Exit Without Saving
to discard. - On the Summary screen, select the chevron (>) to open and review your scan settings.
- Use the edit icon link to jump to a specific screen to edit a setting.
- Click Finish & Save to add the new Scan, Previous to return to the previous screen, or Exit Without Saving to discard.
Remote Target
Procedure:
- After selecting the Files & Folders tile, select the Remote Target target type.
- The next screen is the Select the agent(s) to perform the scan screen. Select from the All On-Prem Agents list.
To expand the list, select the chevron (>) next to the entry.
- To add an agent to the Selected On-Prem Agents list, click the arrow next to the agent name.
Note: Agent v13, Agent v13.1, Agent v13.2, and Legacy Agents cannot be combined.
If you select more than one version of the agents, you will get an error message and be prompted to reselect your agents.
- To move an agent back to the All On-Prem Agents list from the Selected On-Prem Agents list, click the arrow next to the agent name.
- Click Next to proceed, Previous to return to the previous screen, or Exit Without Saving
to discard. - On the Select target(s) to scan screen, select a target from the All Targets list.
- Use the chevron(>) to expand the target list.
- Use the arrow next to the target name to move the target to the Selected Targets list.
- Select the arrow next to the target name to move it from the Selected Targets list back to the All Targets list.
- Click Next to proceed, Previous to return to the previous screen, or Exit Without Saving
to discard. - On the Select the search location type screen, choose one. Expand a each section for more information.
Full Computer Scan
This example uses the Full Computer Scan location type.
Procedure:
- On the Select file type scan options screen, select from the options list.
- These options are described and detailed in Scan Options.
- Click Next to proceed, Previous to return to the previous screen, or Exit Without Saving
to discard. - Click the Advanced Optionsbutton in the upper, right corner and the Select file type scan options - Advanced Options screen opens.
- To return to the Basic Options view, click the button again.
These options are described and detailed in Scan Options.
- Click Next to proceed, Previous to return to the previous screen, or Exit Without Saving
to discard. - On the Select advanced options screen, select from additional options.

These options are described and detailed in Scan Options.
- Click Next to proceed, Previous to return to the previous screen, or Exit Without Saving
to discard. - The next screen is the Select the scan schedule screen. To set up date, time, and / or recurrence for a scan, see How to Set the Date and Time of a Scheduled Scan.
- Click Next to proceed, Previous to return to the previous screen, or Exit Without Saving
to discard. - On the Who should receive notification of scan completion screen, select how to send email notifications.
- I'll Manually Check My Scans Results
- Send An Email Notification
- Select a user from the drop-down list or type an email address in the entry field and click Enter.
- To add additional email addresses, click the plus (+) icon and type the email addresses in the entry field.
- Click Next to proceed, Previous to return to the previous screen, or Exit Without Saving
to discard. - On the Summary screen, select the chevron (>) to open and review your scan settings.
- Use a edit icon link to jump to a specific screen to edit a setting.

- Click Finish & Save to add the new Scan, Previous to return to the previous screen, or Exit Without Saving to discard.
Custom Folder List
Procedure:
- Select the Custom Folder List location type. The Select which customer folders to add screen opens.

- To include folders, type the name(s) of the folders, one title per line, in the Include field.
- To exclude folders, type the name(s) of the folders, one title per line, in the Exclude field.
You must include or exclude at least one folder.
- To import a custom folder list .csv file, click Import Customer Folders button in the upper, right of the screen. The Import CSV window opens.
- Select:
- Include
- Exclude
- By Flag (includes & excludes)
The Select a csv file to import* entry field is required. Once your cursor is in this field, a folder on your computer opens.
- Enter or locate the folder to use. Click Open. Click the Import button to import the folder or Cancel to discard.
- You can also click the Advanced Options button on this screen.
- When selected the Add Custom Folders - Advanced Options screen opens.
- The button now says Basic Options.
- To return to the previous screen, click this button again.
- To continue, select Next.
These options are described and detailed in Scan Options.
- Click Finish & Save to add the new Scan, Previous to return to the previous screen, or Exit Without Saving to discard.
- The next screen is the Select file type scan options screen.
- You can select the Advanced Options button from this page. It opens the Select file type scan options - Advanced Options screen.
- The button now says Basic Options. Click the button to go back to the previous screen. To continue, select Next.
These options are described and detailed in Scan Options.
- Click Next to proceed, Previous to return to the previous screen, or Exit Without Saving
to discard. - On the Select advanced options screen are additional options.

These options are described and detailed in Scan Options.
- Click Next to proceed, Previous to return to the previous screen, or Exit Without Saving
to discard. - On the Select Discovery Team Settings screen, select settings.
Note: The screen only displays when more than one On-Prem agent is selected.
Agent version 13.0+
Ensure these ports are open.
-
Port 5672:
Use these settings:-
Open for Inbound TCP communication on the Discovery Agent.
-
Open for Outbound TCP communication on ALL other agents involved in the same scan to the Discovery Agent.
NOTE: This communication is for reading and writing information to the message queue.
-
-
Port 15672:
Use these settings:-
Open for Inbound TCP communication on the Discovery Agent.
-
Open for Outbound TCP communication on ALL other agents involved in the same scan to the Discovery Agent.
NOTE: This is for the Message Queue Management Interface and API.
-
Agent version 13.2+
Ensure these ports are open.
-
Ports 5671 & 5672:
Use these settings:-
Open for Inbound TCP communication on the Discovery Agent.
-
Open for Outbound TCP communication on ALL other agents involved in the same scan to the Discovery Agent.
NOTE: This communication is for reading and writing information to the message queue.
-
-
Ports 15671 & 15672:
Use these settings:-
Open for Inbound TCP communication on the Discovery Agent.
-
Open for Outbound TCP communication on ALL other agents involved in the same scan to the Discovery Agent.
NOTE: This is for the Message Queue Management Interface and API.
-
-
Discovery Agent: Select an agent from the drop-down list.
Note: Distributed scans use the assigned discovery agent to conduct location discovery and provide a queue for all other agents to be assigned locations for scanning.
While the Discovery Agent can be manually chosen, it is recommended that you use the preferred Discovery Agent.
-
Configure Agent IPs: If your organization requires it, you can set a specific IP address.
- Click Configure Agent IP's.
- In the Add New IP Address window, type the new IP address and click the plus icon. Hover over the new IP address more options menu and click Make Default.
- Click Save to apply or Cancel to discard.
- For Agent version 13.0 and legacy Agents, choose from these options:
These options are described and detailed in Scan Options.
- Click Next to proceed, Previous to return to the previous screen, or Exit Without Saving
to discard. - The next screen is the Select the scan schedule screen. To set up date, time, and / or recurrence, see How to Set the Date and Time of a Scheduled Scan.
- Click Next to proceed, Previous to return to the previous screen, or Exit Without Saving
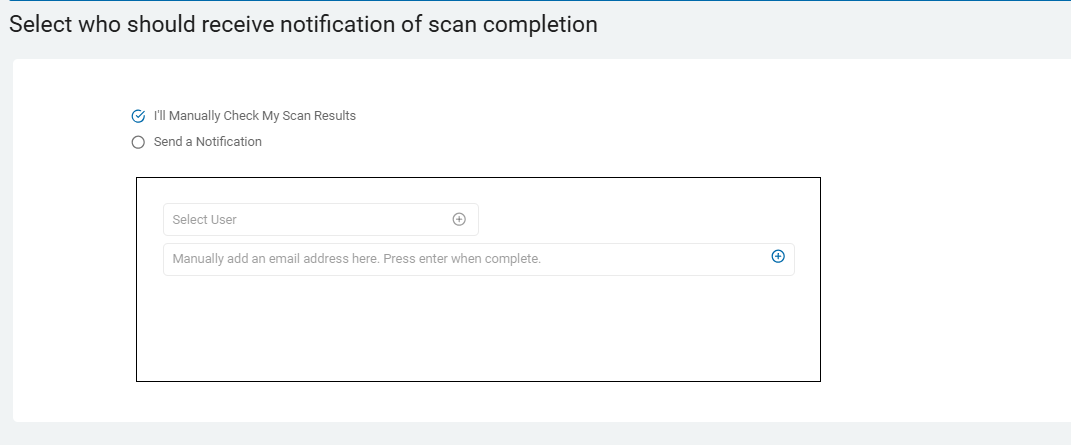
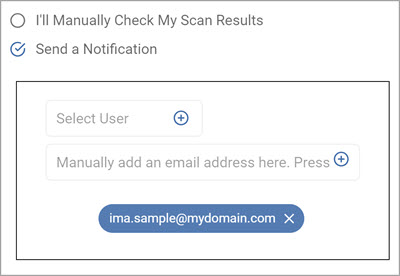
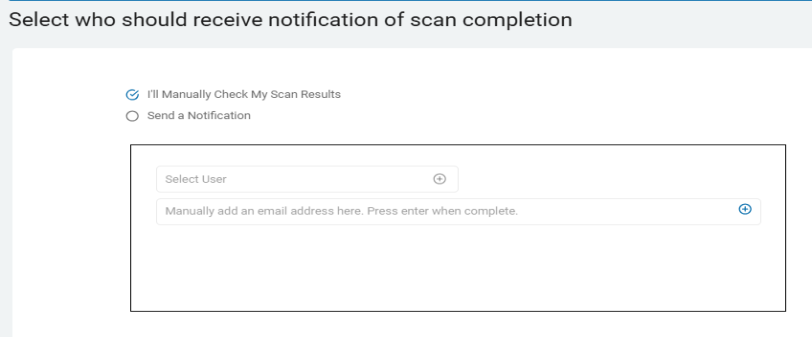
to discard. - On the Select who should receive notification of scan completion screen, select how to send email notifications.
- I'll Manually Check My Scans Results
- Send a Notification
- To add addresses, click the plus (+) icon or type the email addresses in the entry field.
- Click Next to proceed, Previous to return to the previous screen, or Exit Without Saving
to discard. - On the Summary screen, select the chevron (>) to open and review your scan settings.
- Use the edit icon link to jump to a specific screen to edit a setting.
- Click Finish & Save to add the new Scan, Previous to return to the previous screen, or Exit Without Saving to discard.
Create an Email Scan
Procedure:
- Click the Email tile.

- Select an email service provider.

Exchange
- When you select Exchange, the Select the agent(s) to perform the scan screen opens.
- Select an agent from the All On-Prem Agents list. To expand the list, select the chevron (>) next to the entry.
- To move an agent from the All On-Prem Agents list to the Select On-Prem Agents list, use the arrow next to the agent name.

- To move an agent from the Selected On-Prem Agents list to the All On-Prem Agents list, select the agent you want to return. Click the arrow next to the agent name.

- Click Next to proceed, Previous to return to the previous screen, or Exit Without Saving
to discard. - On the Select the target(s) to scan screen, select a target from the All Targets list. To expand a target, click on the chevron (>).

- To move a target to the Selected Targets list, click the arrow next to the target name.
- To move a target from Selected Targets to All Targets, click the arrow next to the target name.

- Click Next to proceed, Previous to return to the previous screen, or Exit Without Saving
to discard. - On the Scan servers by account list? screen, upload or enter the accounts you want to include in your scan.
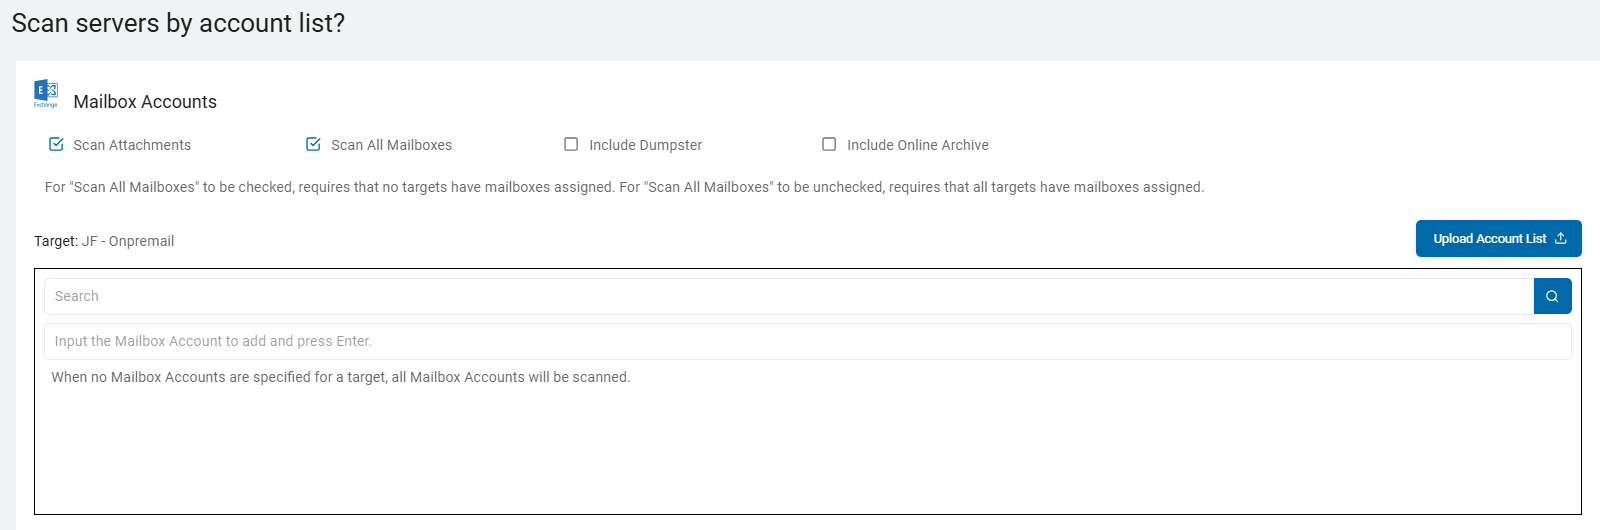
- You can select actions for the Mailbox Accounts:
- Scan Attachments
- Scan All Mailboxes
- Include Dumpster
- Include Online Archive
If you select no Mailbox Accounts for a target then all Mailbox Accounts are scanned.
For Scan All Mailboxes to be checked, requires that no targets have mailboxes assigned.
For Scan All Mailboxes to be unchecked, requires that all targets have mailboxes assigned.
-
Click Next to proceed, Previous to return to the previous screen, or Exit Without Saving
to discard. - The next screen is Select file type scan options.
These options are described and detailed in Scan Options.
- To select Advanced Options, click the button upper, right of the screen. You can also select the Basic Options button again to return to the previous screen.
- Click Next to proceed, Previous to return to the previous screen, or Exit Without Saving
to discard. - If you click the Advanced Options button, the Select file type scan options - Advanced Options screen opens.
These options are described and detailed in Scan Options.
- Click Next to proceed, Previous to return to the previous screen, or Exit Without Saving
to discard. - The Select Exchange / Outlook options screen, displays options specific to Exchange and Outlook.
These options are described and detailed in Scan Options.
- Click Next to proceed, Previous to return to the previous screen, or Exit Without Saving
to discard. - The Select advanced options screen opens.

These options are described and detailed in Scan Options.
- Click Next to proceed, Previous to return to the previous screen, or Exit Without Saving
to discard. - On the Select Discovery Team settings screen, select settings.
Note: The screen only displays when multiple On-prem agents are selected.
Agent version 13.0+
Ensure these ports are open.
-
Port 5672: Use these settings:
-
Open for Inbound TCP communication on the Discovery Agent.
-
Open for Outbound TCP communication on ALL other agents involved in the same scan to the Discovery Agent.
Note: This communication is for reading and writing information to the message queue.
-
-
Port 15672: Use these settings:
-
Open for Inbound TCP communication on the Discovery Agent.
-
Open for Outbound TCP communication on ALL other agents involved in the same scan to the Discovery Agent.
Note: This is for the Message Queue Management Interface and API.
-
Agent version 13.2+
Ensure these ports are open.
-
Ports 5671 & 5672: Use the following settings:
-
Open for Inbound TCP communication on the Discovery Agent.
-
Open for Outbound TCP communication on ALL other agents involved in the same scan to the Discovery Agent.
Note: This communication is for reading and writing information to the message queue.
-
-
Ports 15671 & 15672:
Use these settings:-
Open for Inbound TCP communication on the Discovery Agent.
-
Open for Outbound TCP communication on ALL other agents involved in the same scan to the Discovery Agent.
-
Note: This is for the Message Queue Management Interface and API.
-
Discovery Agent: Select an agent from the drop-down list.
Note: Distributed scans use the assigned discovery agent to conduct location discovery and provide a queue for all other agents to be assigned locations for scanning.
While the Discovery Agent can be manually chosen, it is recommended that you use the preferred Discovery Agent.
-
Configure Agent IPs: If your organization requires it, you can set a specific IP address.
- Click Configure Agent IP's.
- In the Add New IP Address box, type the new IP address and click the plus icon.
- Hover over the new IP address more options menu and click Make Default.
- Click Save to apply or Cancel to discard.
For Agent version 13.0 and legacy Agents, choose from these options:
These options are described and detailed in Scan Options.
- Click Next to proceed, Previous to return to the previous screen, or Exit Without Saving
to discard. - The next screen is the Select the scan schedule screen. To set up date, time, and / or recurrence, see How to Set the Date and Time of a Scheduled Scan.
- Click Next to proceed, Previous to return to the previous screen, or Exit Without Saving
to discard. - On the Who should receive notification of scan completion screen, select how to send email notifications.
- I'll Manually Check My Scans Results
- Send a Notification
- Select a user from the drop-down or type an email address in the entry field and click the plus (+) icon or Enter.
- To add additional email addresses, click the plus (+) icon and type the email addresses in the entry field.
- Click Next to proceed, Previous to return to the previous screen, or Exit Without Saving
to discard. - On the Summary screen, select the chevron (>) to open and review your scan settings.
- Use the edit icon link to jump to a specific screen to edit a setting.

- Click Finish & Save to add the new Scan, Previous to return to the previous screen, or Exit Without Saving to discard.
Exchange Online
- When you select Exchange Online as the email provider to scan, the Select the agent(s) to perform the scan screen opens.
- Choose the agents you want to use. Click the chevron (>) to expand the list.
- To add an agent from the All On-Prem Agents list to the Selected On-Prem Agents list, click the arrow next to the agent name.
- To move an agent from the Selected On-Prem Agents list, click the arrow next to the agent name.
- Click Next to proceed, Previous to return to the previous screen, or Exit Without Saving
to discard. - On the Select the target(s) to scan screen, click the chevron (>) to expand the All Targets list.
- To add the target, click the arrow next to the target name. The target moves to the Selected Targets list. To move the target back to the All Targets list, click the arrow next to the target name.
- Click Next to proceed, Previous to return to the previous screen, or Exit Without Saving
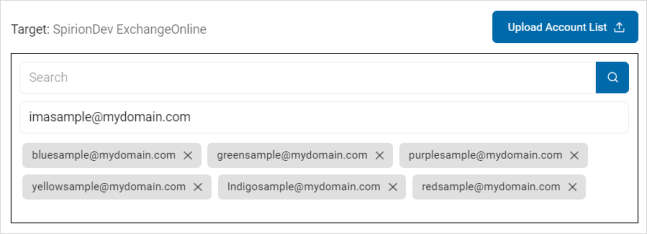
to discard. - On the Select accounts to scan screen, check the Scan Attachments checkbox, if applicable. You can also type account names into the entry field and then select Enter.
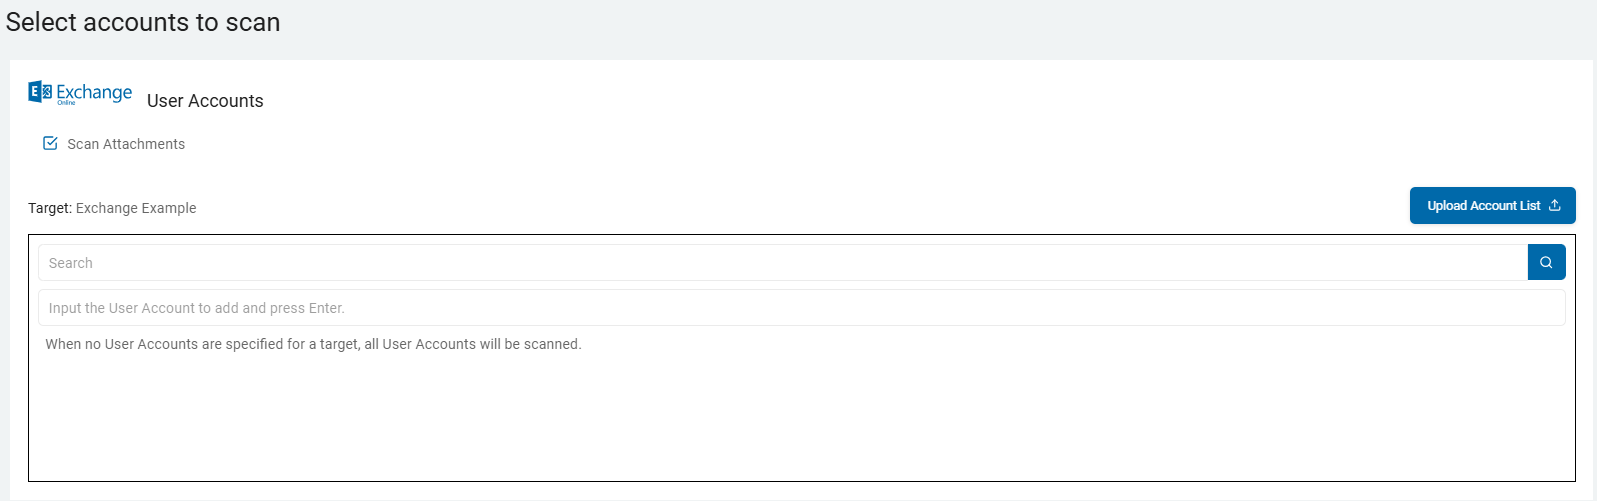
Note: If you do not specify user accounts, by default, all user accounts are scanned.
- To upload multiple accounts:
- Click Upload Account List.

- From your computer, locate and select the .csv file with the accounts to include. Select Open.
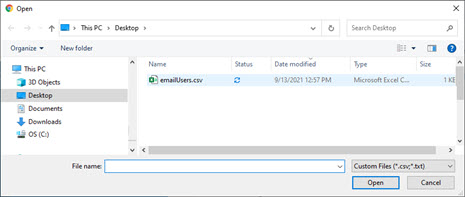
- The user accounts are displayed in the entry field.
- The user accounts are displayed in the entry field.
- Click Next to proceed, Previous to return to the previous screen, or Exit Without Saving
to discard. - On the Select file type scan options screen, select from these Basic Options.
- Click the Advanced Options button at the upper right corner of this screen to access additional options. You can toggle back and forth between these screens using this button.
-
These options are described and detailed in Scan Options.
-
When you click the Advanced Options button, the Select file type scan options - Advanced Options screen opens.
These options are described and detailed in Scan Options.
- Click Next to proceed, Previous to return to the previous screen, or Exit Without Saving
to discard. - The next screen is the Select advanced options.

These options are described and detailed in Scan Options.
- Click Next to proceed, Previous to return to the previous screen, or Exit Without Saving
to discard. - On the Select Discovery Team settings screen, use the displayed options.
Note: The screen only displays when multiple On-Prem agents are selected.
Agent version 13.0+
Ensure these ports are open.
-
Port 5672: Use these settings:
-
Open for Inbound TCP communication on the Discovery Agent.
-
Open for Outbound TCP communication on ALL other agents involved in the same scan to the Discovery Agent.
Note: This communication is for reading and writing information to the message queue.
-
-
Port 15672: Use these settings:
-
Open for Inbound TCP communication on the Discovery Agent.
-
Open for Outbound TCP communication on ALL other agents involved in the same scan to the Discovery Agent.
Note: This is for the Message Queue Management Interface and API.
-
Agent version 13.2+
Ensure these ports are open.
-
Ports 5671 & 5672: Use these settings:
-
Open for Inbound TCP communication on the Discovery Agent.
-
Open for Outbound TCP communication on ALL other agents involved in the same scan to the Discovery Agent.
Note: This communication is for reading and writing information to the message queue.
-
-
Ports 15671 & 15672: Use these settings:
-
Open for Inbound TCP communication on the Discovery Agent.
-
Open for Outbound TCP communication on ALL other agents involved in the same scan to the Discovery Agent.
Note: This is for the Message Queue Management Interface and API.
-
Discovery Agent: Select an agent from the drop-down list.
Note: Distributed scans use the assigned discovery agent to conduct location discovery and provide a queue for all other agents to be assigned locations for scanning.
While the Discovery Agent can be manually chosen, it is recommended that you use the preferred Discovery Agent.
Configure Agent IPs: If your organization requires it, you can set a specific IP address.
- In the Add New IP Address box, type the new IP address and click the plus icon.
- Hover over the new IP address more options menu and click Make Default.
- Click Save to apply or Cancel to discard.
Note: Distributed scans use the assigned discovery agent to conduct location discovery and provide a queue for all other agents to be assigned locations for scanning.
While the Discovery Agent can be manually chosen, it is recommended that you use the preferred Discovery Agent.
Agent version 13.0 and legacy Agents: select from these options.
These options are described and detailed in Scan Options.
- Click Next to proceed, Previous to return to the previous screen, or Exit Without Saving
to discard. - The next screen is the Select the scan schedule screen. To set up date, time, and / or recurrence, see How to Set the Date and Time of a Scheduled Scan.
- Click Next to proceed, Previous to return to the previous screen, or Exit Without Saving
to discard. - On the Who should receive notification of scan completion screen, select how to send email notifications.
I'll Manually Check My Scans Results
Send An Email Notification
- Select a user from the drop-down list or type an email address in the entry field and click Enter.
- To add additional email addresses, click the plus (+) icon and type the email addresses in the entry field.
- Click Next to proceed, Previous to return to the previous screen, or Exit Without Saving
to discard. - On the Summary screen, select the chevron (>) to open and review your scan settings,
- Use a edit icon link to jump to a specific screen to edit a setting.

- Click Finish & Save to add the new Scan, Previous to return to the previous screen, or Exit Without Saving to discard.
Gmail
When you select the email provider Gmail, the Select the agent(s) to perform the scan screen opens.
Choose the agents you want to use for your scan.
- To add an agent from the All On-Prem Agents list to the Selected On-Prem Agents list, click the arrow next to the agent name.
- To move the agent from the Selected On-Prem Agents list to the All On-Prem Agents list, click the arrow next to the agent name.
- Click Next to proceed, Previous to return to the previous screen, or Exit Without Saving
to discard. - On the Select the target(s) to scan screen click the chevron (>) to expand the target list.
- To add target(s) from the All Targets list to the Selected Targets list, click the arrow next to the target name.
- To move a target from the Selected Targets list back to the All Targets list, click the arrow next to the target name.
- Click Next to proceed, Previous to return to the previous screen, or Exit Without Saving
to discard. - On the Select accounts to scan screen, check the box next to Select Scan Attachments.
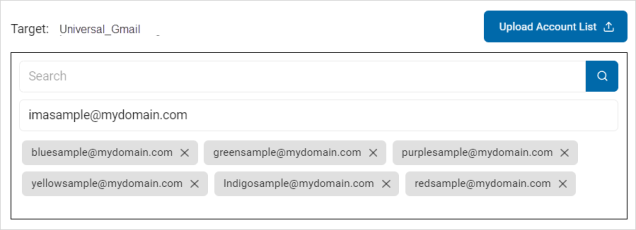
To add user accounts:
Type the user account name in the entry field and click Enter.
Search for the user account name.
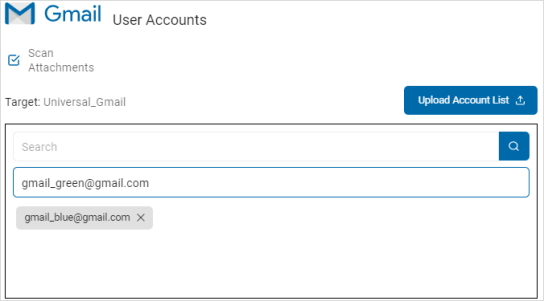
- To upload multiple accounts, click Upload Account List.
- Locate and select the .csv file with the accounts on your computer.

The user accounts are displayed in the target box.
- Click Next to proceed, Previous to return to the previous screen, or Exit Without Saving
to discard. - On the Select file type scan options screen, the Basic Options display.
These options are described and detailed in Scan Options.
- Click Next to proceed, Previous to return to the previous screen, or Exit Without Saving
to discard. - From the Basic Options screen, select the Advanced Options button in the upper, right of the screen. Additional options display.
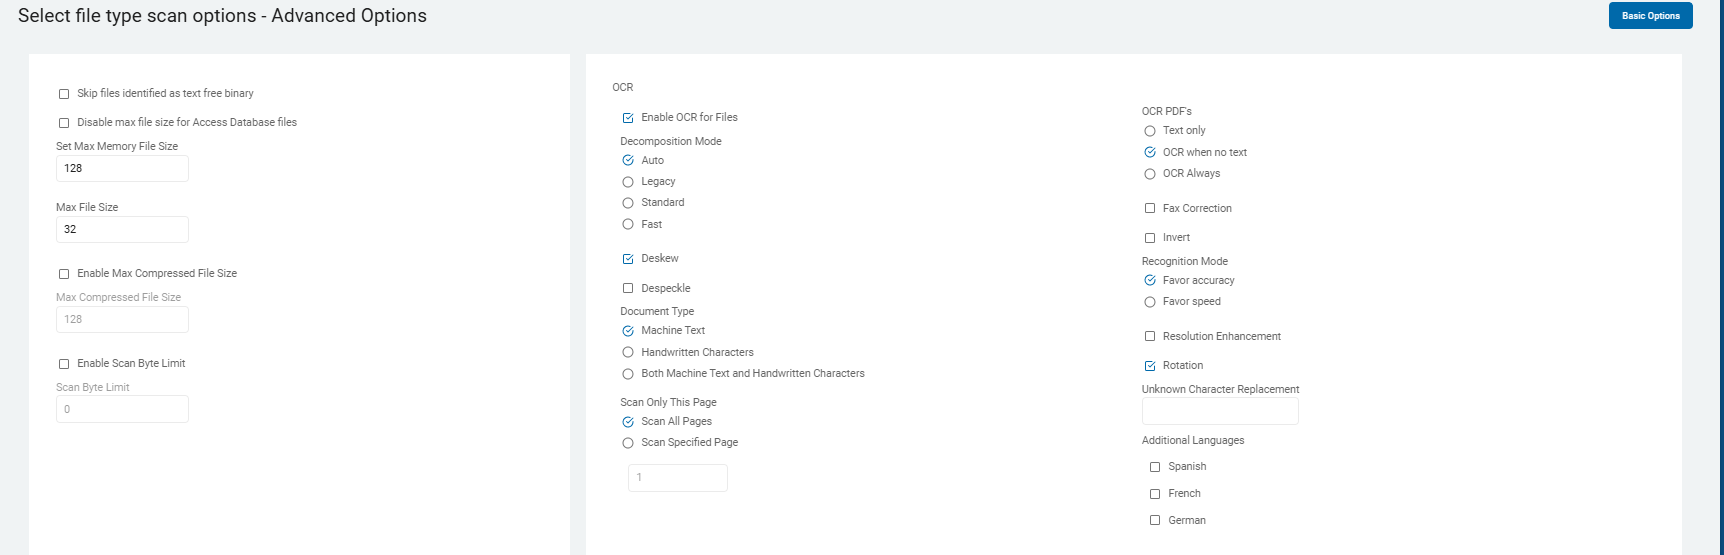
These options are described and detailed in Scan Options.
- Click Next to proceed, Previous to return to the previous screen, or Exit Without Saving
to discard. - Additional are available on the Select advanced options screen.

These options are described and detailed in Scan Options.
- Click Next to proceed, Previous to return to the previous screen, or Exit Without Saving
to discard. - On the Select Discovery Team settings screen, based on your Agent version, use these settings.
Note: The screen only displays when multiple On-Prem agents are selected.
Agent version 13.0+: Ensure these ports are open.
Port 5672: Use these settings:
Open for Inbound TCP communication on the Discovery Agent.
Open for Outbound TCP communication on ALL other agents involved in the same scan to the Discovery Agent.
Note: This communication is for reading and writing information to the message queue.
Port 15672: Use these settings:
Open for Inbound TCP communication on the Discovery Agent.
Open for Outbound TCP communication on ALL other agents involved in the same scan to the Discovery Agent.
Note: This is for the Message Queue Management Interface and API.
Agent version 13.2+: Ensure these ports are open.
Ports 5671 & 5672: Use the following settings:
Open for Inbound TCP communication on the Discovery Agent.
Open for Outbound TCP communication on ALL other agents involved in the same scan to the Discovery Agent.
Note: This communication is for reading and writing information to the message queue.
Ports 15671 & 15672: Use these settings:
Open for Inbound TCP communication on the Discovery Agent.
Open for Outbound TCP communication on ALL other agents involved in the same scan to the Discovery Agent.
Note: This is for the Message Queue Management Interface and API.
Discovery Agent: Select an agent from the drop-down list.
Note: Distributed scans use the assigned discovery agent to conduct location discovery and provide a queue for all other agents to be assigned locations for scanning.
While the Discovery Agent can be manually chosen, it is recommended that you use the preferred Discovery Agent.
Configure Agent IPs: If your organization requires it, you can set a specific IP address.
- In the Add New IP Address box, type the new IP address and click the plus icon.
- Hover over the new IP address more options menu and click Make Default.
- Click Save to apply or Cancel to discard.
Agent version 13.0 and legacy Agents: Select from these options.
These options are described and detailed in Scan Options
- Click Next to proceed, Previous to return to the previous screen, or Exit Without Saving
to discard. - The next screen is the Select the scan schedule screen. To set up date, time, and / or recurrence, see How to Set the Date and Time of a Scheduled Scan.
- Click Next to proceed, Previous to return to the previous screen, or Exit Without Saving
to discard. - On the Who should receive notification of scan completion screen, select how to send email notifications.
- I'll Manually Check My Scans Results
- Send a Notification
- Select a user from the drop-down list or type an email address in the entry field and click Enter.
- To additional email addresses, click the plus (+) icon and type the email addresses in the entry field.
- Click Next to proceed, Previous to return to the previous screen, or Exit Without Saving
to discard. - On the Summary screen, select the chevron (>) to open and review your scan settings.
- Use the edit icon link to jump to a specific screen to edit a setting.

- Click Finish & Save to add the new Scan, Previous to return to the previous screen, or Exit Without Saving to discard.
Create a Collaboration Tools Scan
Click the Collaboration Tools tile.

- Click Next to proceed, Previous to return to the previous screen, or Exit Without Saving
to discard. - On the Select the collaboration tool to scan screen, select:
SharePoint | SharePoint Online
Bitbucket
- Expand a section for more information.
SharePoint | SharePoint Online
Use the following steps to perform a sensitive data scan of SharePoint On-Premise or Online.
- After selecting the collaboration tool SharePoint, the Select the agent(s) to perform the scan screen opens.
- Choose the agents you want to use for your scan.
- To add an agent from the All On-Prem Agents list to the Selected On-Prem Agents list, click the arrow next to the agent name.
- To move an agent from the Selected On-Prem Agents list back to the All On-Prem Agents list, click the arrow next to the agent name.
- Click Next to proceed, Previous to return to the previous screen, or Exit Without Saving
to discard. - On the Select the target(s) to scan screen click the chevron (>) to expand the target list.
- To add target(s) from the All Targets list to the Selected Targets list, click the arrow next to the target name.

- To add a target from the Selected Targets list back to the All Targets list, click the arrow next to the target name.
- Click Next to proceed, Previous to return to the previous screen, or Exit Without Saving
to discard. - On the Select SharePoint options screen, select all applicable:
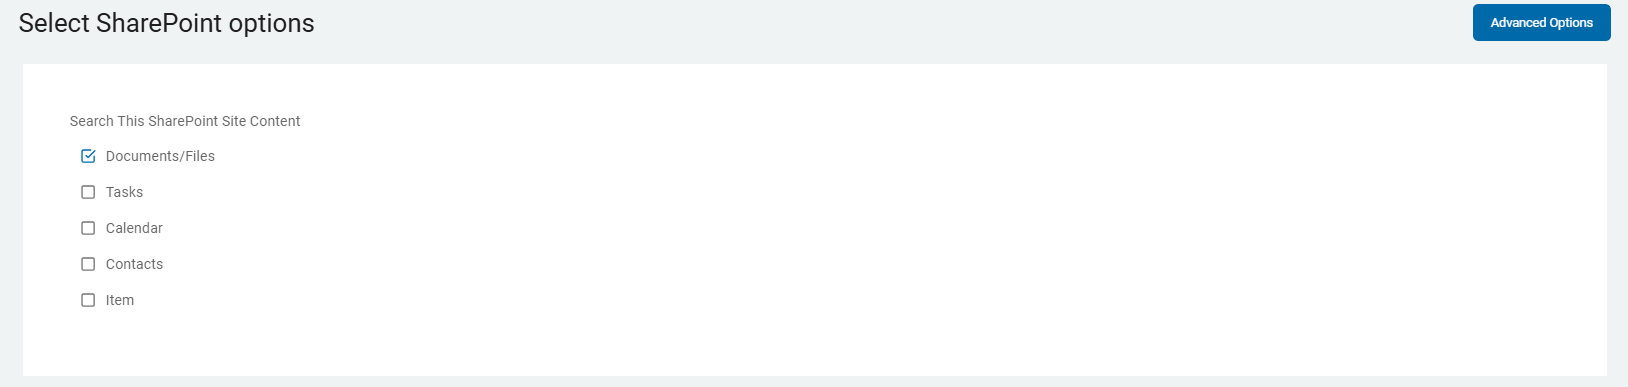
Search this SharePoint Site Content
Select the types to search within SharePoint sites.
Specify the search types to include or exclude when searching SharePoint sites.
By default, searching of all file types in the SharePoint document library is enabled.
Alternately, searches can be enabled for tasks, calendar events, or contacts that have been synchronized with Outlook or input into SharePoint.
When using this setting outside of the console, note that the value for this setting is a bitmask of the logical OR of any of these values.
When created in the Windows Registry, they are of type REG_DWORD.
When entered into the Windows Registry or a configuration XML file, they should be entered as hexadecimal values.
When entered into a security template (.inf) file, they should be entered in decimal.
| Name | Value | Default |
| Documents/Files | 0x00000001 | On |
| Tasks | 0x00000002 | Off |
| Calendar | 0x00000004 | Off |
| Contacts | 0x00000008 | Off |
| Item | 0x00000010 | Off |
- Click Advanced Options button for more options.
- Click Next to proceed, Previous to return to the previous screen, or Exit Without Saving
to discard. - On the Select advanced SharePoint options, select the settings to use.
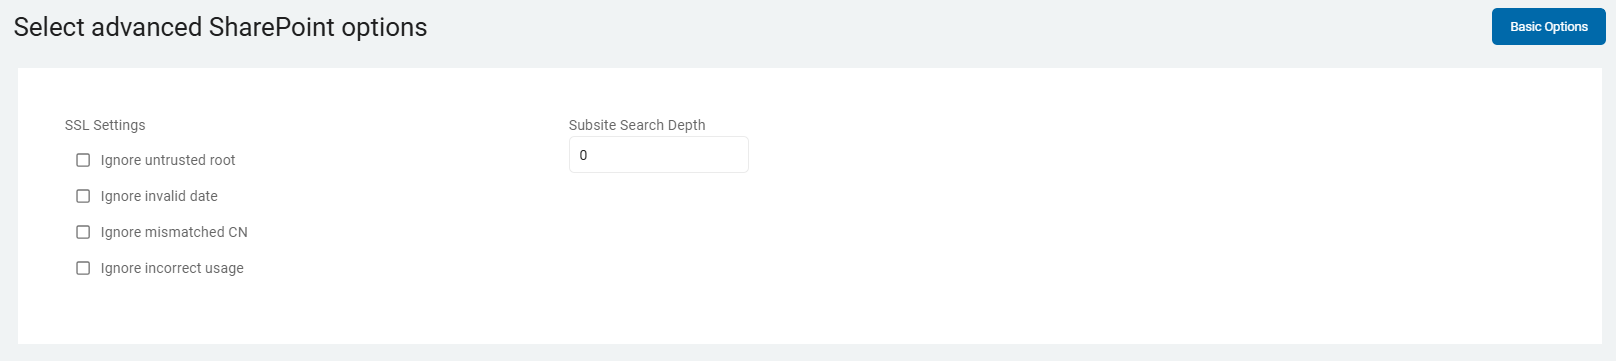
SSL Settings
The SSL settings to use when searching SharePoint sites.
Ignore untrusted root: Continue searching if the root certificate of the SSL chain is not currently in the trust store.
Ignore invalid date: Continue searching if the SSL certificate for the URL has an invalid or expired date.
Ignore mismatched CN: Continue searching if the domain name on the SSL certificate does not match the URL configuration.
Ignore incorrect usage: Continue searching if the SSL certificate is intended for a purpose other than verifying the identity of the sender and encrypting server communications.
When using this setting outside of the console, note that the value for this setting is a bitmask of the logical OR of any of these values.
When created in the Windows Registry, they are of type REG_DWORD.
When entered into the Windows Registry or a configuration XML file, they should be entered as hexadecimal values.
When entered into a security template (.inf) file, they should be entered in decimal.
| Name | Value | Default |
Ignore untrusted root | 0x00000001 | False |
Ignore invalid date | 0x00000002 | False |
Ignore mismatched CN | 0x00000004 | False |
- Click Next to proceed, Previous to return to the previous screen, or Exit Without Saving
to discard. - On the Select file type scan options - Advanced Options, select the options you need.
These options are described and detailed in Scan Options.
- Click Next to proceed, Previous to return to the previous screen, or Exit Without Saving
to discard. - On the Select advanced options screen, choose from the additional options.
These options are described and detailed in Scan Options.
- Click Next to proceed, Previous to return to the previous screen, or Exit Without Saving
to discard. - On the Select Discovery Team settings screen, choose the applicable options.
Note: The screen only displays when multiple On-Prem agents are selected.
Agent version 13.1 and above:
Discovery Agent: Select an agent from the drop-down list.
Note: Distributed scans use the assigned discovery agent to conduct location discovery and provide a queue for all other agents to be assigned locations for scanning.
While the Discovery Agent can be manually chosen, it is recommended that you use the preferred Discovery Agent.
Configure Agent IPs: If your organization requires it, you can set a specific IP address.
Click Configure Agent IP's.
In the Add New IP Address window, type the new IP address and click the plus icon.
Hover over the new IP address more options menu and click Make Default.
Click Save to apply or Cancel to discard.
For Agent version 13.0 and legacy Agents, select from the options displayed.
These options are described and detailed in Scan Options.
- Click Next to proceed, Previous to return to the previous screen, or Exit Without Saving
to discard. - The next screen is the Select the scan schedule screen. To set up date, time, and / or recurrence, see How to Set the Date and Time of a Scheduled Scan.
- Click Next to proceed, Previous to return to the previous screen, or Exit Without Saving
to discard. - On the Who should receive notification of scan completion screen, select how to send email notifications
- I'll Manually Check My Scans Results
- Send An Email Notification:

- Select a user from the drop-down list and / or type an email address in the entry field and click Enter.
- To add additional addresses, click the plus icon and type the email addresses in the entry field.
- Click Next to proceed, Previous to return to the previous screen, or Exit Without Saving
to discard. - On the Summary screen, select the chevron (>) to open and review your scan settings.
- Use the edit icon link to jump to a specific screen to edit a setting.

- Click Finish & Save to add the new Scan, Previous to return to the previous screen, or Exit Without Saving to discard.
Bitbucket
On the Select the agent(s) to perform the scan screen, choose the agents you want to use for your scan.
- To add an agent from the All On-Prem Agents list to the Selected On-Prem Agents list, click the arrow next to the agent name.
- To move an agent from the Selected On-Prem Agents list back to the All On-Prem Agents list, click the arrow next to the agent name.
- Click Next to proceed, Previous to return to the previous screen, or Exit Without Saving
to discard. - On the Select the targets(s) to scan screen, choose the targets you want to use for your scan. Click the chevron (>) to expand the sections.
- To add an target from the All Targets list to the Selected Targets list, click the arrow next to the target name.
To add target(s) from the Selected Targets list back to the All Targets list, click the arrow next to the target name.

- Click Next to proceed, Previous to return to the previous screen, or Exit Without Saving
to discard. - On the Select file type scan options screen, select from the displayed options.
These options are described and detailed in Scan Options.
If applicable, click Advanced Options button to view additional options or click the Basic Options button to return to the previous screen.
- Click Next to proceed, Previous to return to the previous screen, or Exit Without Saving
to discard. - On the Select file type scan options - Advanced Options, choose from the options:

These options are described and detailed in Scan Options.
- Click Next to proceed, Previous to return to the previous screen, or Exit Without Saving
to discard. - On the Select advanced options screen, you can use these additional options.
These options are described and detailed in Scan Options.
- Click Next to proceed, Previous to return to the previous screen, or Exit Without Saving
to discard. - On the Select Discovery Team settings screen, fill in the following:
Note: Discovery Team Settings only applies when multiple agents are assigned to a scan at runtime.
Agent version 13.1 and above:
Discovery Agent: Select an agent from the drop-down list.
Note: Distributed scans use the assigned discovery agent to conduct location discovery and provide a queue for all other agents to be assigned locations for scanning.
While the Discovery Agent can be manually chosen, it is recommended that you use the preferred Discovery Agent.
Configure Agent IPs: If your organization requires it, you can set a specific IP address.
Click Configure Agent IP's.
In the Add New IP Address window, type the new IP address and click the plus icon.
Hover over the new IP address more options menu and click Make Default.
Click Save to apply or Cancel to discard.
Agent version 13.0 and legacy Agents: Select from the following:
These options are described and detailed in Scan Options
- Click Next to proceed, Previous to return to the previous screen, or Exit Without Saving
to discard. - The next screen is the Select the scan schedule screen. To set up date, time, and / or recurrence, see How to Set the Date and Time of a Scheduled Scan.
- Click Next to proceed, Previous to return to the previous screen, or Exit Without Saving
to discard. - On the Select who should receive notification of scan completion screen, select how to send email notifications:
- I'll Manually Check My Scans Results
- Send An Email Notification

- Select a user from the drop-down list or type an email address in the entry field and click Enter.
- To add additional email addresses, click the plus (+) icon and type the email addresses in the entry field.
- Click Next to proceed, Previous to return to the previous screen, or Exit Without Saving
to discard. - On the Summary screen, select the chevron (>) to open and review your scan settings.
- Click the edit icon link in a section and jump to a specific screen to edit a setting.
- Click Finish & Save to add the new Scan, Previous to return to the previous screen, or Exit Without Saving to discard.
Create a Database Scan
Procedure:
Note: To establish the connection required to scan a database target, the relevant driver must be installed on the agent host system
Click the Database tile.
- On the Select which database to search screen, click a database type tile.
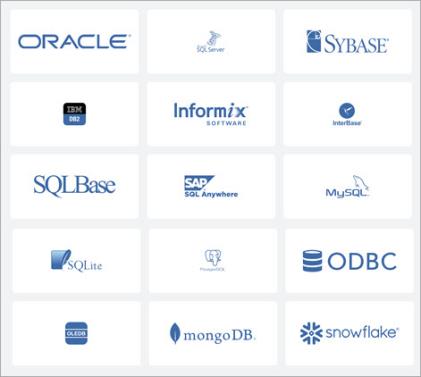
Oracle
SQL Server
Sybase
IBM DB2
Informix
InterBase
SQLBase
SAP SQL Anywhere
MySQL
SQLite
PostgreSQL
ODBC
OLEDB
mongoDB
Snowflake
- Click Next to proceed, Previous to return to the previous screen, or Exit Without Saving
to discard. - On the Select the agent(s) to perform the scan screen, expand the chevron (>) next to an agent listing.
- To select an agent, click the arrow next to the agent name and move the agent from All On-Prem Agents list to the Selected All-Prem Agents list.

- To move an agent from the Selected On-Prem Agents list back to the All On-Prem Agents list, click the arrow next to the agent name.

- Click Next to proceed, Previous to return to the previous screen, or Exit Without Saving
to discard. - On the Select the target(s) to scan screen, select the chevron (>) to expand the target listing.
- To select an target, click the arrow next to the target name and move the target from All Targets list to the Selected Targets list.
- To move target from the Selected Target list back to the All Targets list, click the arrow next to the target name.
- Click Next to proceed, Previous to return to the previous screen, or Exit Without Saving
to discard. - The Select SQL Advanced Options screen displays.
SQL Advanced Options
Include Primary Key Data
If a database includes a Primary Key column, it is possible to return the data in the cell of the Primary Key column for the row in which a result was found.
The data will be displayed in the Preview window along with the list of columns in which the result was found.
To include the Primary Key data, set this to "Include Primary Key data" (1).
Do not include Primary Key Data
This is the default setting for Primary Key Data.
Include Primary Key Data
If a database includes a Primary Key column, it is possible to return the data in the cell of the Primary Key column for the row in which a result was found.
The data is displayed in the Preview window along with the list of columns in which the result was found.
To include the Primary Key data, set this to "Include Primary Key data" (1).
Set Non-Matching cells limit
When searching structured data (files or databases searched via a connection string), the endpoint application will look within a column for data that matches the specified data type.
After a specified number of cells in that column are searched without finding any matches, the search will move on to the next column.
The counter is started at the first row and continues until the limit is hit or a match is found.
If a match is found, all subsequent rows in that column will be searched.
To disable this limit and search all cells, use a value of 0.
Exclude Column Types
Specify which column types are excluded when searching databases.
When using this setting outside of the console, note that the value for this setting is a bitmask of the logical OR of any of these values.
When created in the Windows Registry, they are of type REG_DWORD.
When entered into the Windows Registry or a configuration XML file, they should be entered as hexadecimal values.
When entered into a security template (.inf) file, they should be entered in decimal.
| Description | Value | Default |
| Exclude Integer Types | 0x00000001 | Off |
| Exclude Double Types | 0x00000002 | Off |
| Exclude DateTime Types | 0x00000004 | Off |
Exclude String Types | 0x00000008 | Off |
| Exclude Blob Types | 0x00000010 | Off |
| Exclude Cursor Types | 0x00000020 | Off |
Log Level
When searching databases via the Database Search Module, it is desirable to see detailed logging information during configuration or troubleshooting.
The logging specified via this setting only applies when logging has been enabled and only specific log entries are displayed if their corresponding log type has been enabled
For example: Info, Error
The following log levels are available:
0 (Default): Standard logging: Includes basic information such as the name of the table being searched and errors.
1: Additional logging: Standard logging plus information about the status of the search for the current row.
2: Comprehensive logging: Additional logging plus details about each table, column and row.
3: Debug logging: Comprehensive logging plus the actual cell data for each cell searched.
4: Full logging: Data from the database will be written in clear text to the client log file.
Note: Data from the database is written in clear text to the client log file
Note: Logging beyond the default level, especially the maximum level, creates very large log files and may contain sensitive information.
Row Count Start - Logging (Entry Field)
When the setting Settings\Locations\Databases\LogLevel is set to 1, it is possible to specify a row at which additional, detailed column information can be logged.
To enable this logging, specify the row number at which to start.
This setting should only be set after consulting with the Support Team.
Row Count Start (Entry Field)
The row number at which to start detailed column logging:
When the setting Settings\Locations\Databases\LogLevel is set to 1, it is possible to specify a row at which additional, detailed column information can be logged.
To enable this logging, specify the row number at which to start.
This setting should only be set after consulting with the Support Team.
Row Count Stop
By default, all rows in a target database is searched.
To specify the maximum number of rows to search in each table, set this to a value greater than 0.
Once that number of rows have been searched, the search of that table will be stopped and searching resumes with the next appropriate table.
Scan Column Names
By default, all columns in a specified database are searched.
To search only specific columns, enter those table names, one per line.
The column name list applies to all databases configured to be searched.
By default, the comparison of column names requires an exact match.
To allow a partial match, set ColumnMatchType.
To use this list as a list of columns to exclude from the search, set SearchColumnNamesIsExcludeList.
Require exact match
By default, the comparison of column names requires an exact match.
To allow a partial match, set ColumnMatchType.
Allow partial match
By default, all columns in a specified database are searched.
To search only specific columns, enter those table names, one per line.
The column name list applies to all databases configured to be searched.
By default, the comparison of column names requires an exact match.
To allow a partial match, set ColumnMatchType.
To use this list as a list of columns to exclude from the search, set SearchColumnNamesIsExcludeList.
Include/Exclude Columns (check to exclude)
By default, the column names listed in SearchColumnNames must match exactly to be included or excluded from the search.
To allow partial matching - for example allowing the value zip (when specified in SearchColumnNames) to match the column ZipCodes, set this to "Allow partial match" (1).
By default, the comparison of column names requires an exact match.
To allow a partial match, set ColumnMatchType.
Column Names to Include/Exclude(Entry Field)
By default, when SearchColumnNames is used to specify specific column names, only those columns are included in the search.
To search all columns except those specified in SearchColumnNames, set this to "Exclude list" (1).
By default, all columns in a specified database are searched.
To search only specific columns, enter those table names, one per line.
The column name list applies to all databases configured to be searched.
To use this list as a list of columns to exclude from the search, set SearchColumnNamesIsExcludeList.
Scan Table Names
By default, all tables in a specified database are searched.
To search only specific tables, enter those table names, one per line.
The table name list applies to all databases configured to be searched.
By default, the comparison of table names requires an exact match. To allow a partial match, set TableMatchType.
Require exact match
By default, the comparison of table names requires an exact match.
To allow a partial match, set TableMatchType.
Allow partial match
By default, all columns in a specified database are searched.
To search only specific columns, enter those table names, one per line.
The column name list applies to all databases configured to be searched.
By default, the comparison of column names requires an exact match. To allow a partial match, set ColumnMatchType.
To use this list as a list of columns to exclude from the search, set SearchColumnNamesIsExcludeList.
Include/Exclude Tables (Check to exclude)
To use this list as a list of tables to exclude from the search, set SearchTableNamesIsExcludeList.
Table Names to Include/Exclude (Entry Field)
By default, all tables in a specified database are searched.
To search only specific tables, enter those table names, one per line.
The table name list applies to all databases configured to be searched.
By default, the comparison of table names requires an exact match. To allow a partial match, set TableMatchType.
To use this list as a list of tables to exclude from the search, set SearchTableNamesIsExcludeList.
Scan Table Types
Specify whether tables or views is included when searching databases.
When using this setting outside of the console, note that the value for this setting is a bitmask of the logical OR of any of these values.
When created in the Windows Registry, they are of type REG_DWORD.
When entered into the Windows Registry or a configuration XML file, they need to be entered as hexadecimal values.
When entered into a security template (.inf) file, they need to be entered in decimal.
| Description | Value | Default |
Include Tables | 0x00000001 | On |
| Include Views | 0x00000002 | Off |
Database Preview Length (Entry Field)
To provide context to matches when viewing results on the console, version 10.7 and later of the endpoints and console can send the specified number of characters from before and after the match itself.
By default, no characters preceding or following database matches will be sent to the console.
Maximum allowed number of characters is 1000.
A value of 0 disables sending preview information to the console.
Valid values:
0: Disabled (no preview data will be sent to the console)
1-1000: The specified number of characters from before and after the database match will be sent to the console
>1000: Invalid (the value will be set back to the default of 20)
Note: When Console\sendMatch is set to Disable (0), preview information will not be sent to the console.
Database Preview Match Max (Entry Field)
Specify the maximum number of unique keyword matches in a location to consider all of the keyword matches as part of the results for that location.
If the number of unique keyword matches exceeds the value of this setting, then the matches will not be included in the results for this location.
This setting is only read if there are keywords configured as part of the custom type search.
When using keyword custom type searches, this value can be used in conjunction with the CustomKeywords\minRequired setting to refine the results.
The default value of zero (0) specifies that there is no maximum and that all keyword matches should be included in the results.
To set a maximum, specify the number in this setting.
Example:
Five unique keywords are configured:
| Keyword Names | Keyword |
|---|---|
| KeyName1 | Key1 |
| KeyName2 | Key2 |
| KeyName3 | Key3 |
| KeyName4 | Key4 |
| KeyName5 | Key5 |
maxAllowed = 3
For a location, "Key1" and "Key2" are matched, those matches are included in the results for the location.
For a location, "Key1","Key2","Key3", and "Key4" are matched, none of those matches are included in the results for the location.
When the mongoDB database is selected to scan, the NoSQL Advanced Options display instead of the Select SQL Advanced Options screen.
NoSQL Advanced Options (MongoDB only)
Procedure:
Enter the values in the table below:
| Name | Description | |||
|---|---|---|---|---|
| Admin Databases | Select one:
| |||
| File Attachment Min Size | Type the minimum attachment size required. | |||
| File Attachment Max Size | Type the maximum attachment allowed size. | |||
| Record Count Stop | Type the record number to stop the scan on. | |||
| Record Min Size | Type the minimum record size required. | |||
| Record Max Size | Type the maximum record size allowed. | |||
| Store Min Size | Type the minimum storage size required. | |||
| Store Max Size | Type the maximum storage size allowed. | |||
| Database Min Size | Type the minimum database size required. | |||
| Database Max Size | Type the maximum database size allowed. | |||
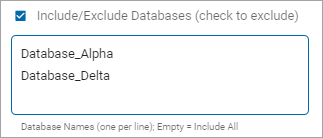
| Database Names |
| |||
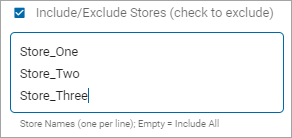
| Store Names |
| |||
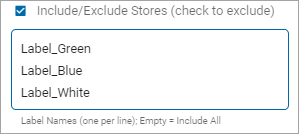
| Label Names |
|
- Click Next to proceed, Previous to return to the previous screen, or Exit Without Saving
to discard. - On the Select advanced options screen, select the applicable options.

These options are described and detailed in Scan Options.
- Click Next to proceed, Previous to return to the previous screen, or Exit Without Saving
to discard. - On the Select Discovery Team settings screen, choose from the displayed options.
Note: Discovery Team Settings only applies when multiple agents are assigned to a scan at runtime.
Agent version 13.2+: Ensure these ports are open.
Ports 5671 & 5672:
Use these settings:Open for Inbound TCP communication on the Discovery Agent.
Open for Outbound TCP communication on ALL other agents involved in the same scan to the Discovery Agent.
Note: This communication is for reading and writing information to the message queue.
Ports 15671 & 15672:
Use these settings:Open for Inbound TCP communication on the Discovery Agent.
Open for Outbound TCP communication on ALL other agents involved in the same scan to the Discovery Agent.
Note: This is for the Message Queue Management Interface and API.
Discovery Agent: Select an agent from the drop-down list.
Note: Distributed scans use the assigned discovery agent to conduct location discovery and provide a queue for all other agents to be assigned locations for scanning.
While the Discovery Agent can be manually chosen, it is recommended that you use the preferred Discovery Agent.
Configure Agent IPs: If your organization requires it, you can set a specific IP address.
- Click Configure Agent IP's.
- In the Add New IP Address window, type the new IP address and click the plus icon.
- Hover over the new IP address more options menu and click Make Default.
- Click Save to apply or Cancel to discard.
For Agent version 13.0 and legacy Agents: Choose from these options:
- Click Next to proceed, Previous to return to the previous screen, or Exit Without Saving
to discard. - The next screen is the Select the scan schedule screen.
- To set up date, time, and / or recurrence, see How to Set the Date and Time of a Scheduled Scan.
- Click Next to proceed, Previous to return to the previous screen, or Exit Without Saving
to discard. - On the Select who should receive notification of scan completion screen, select how to send email notifications.
- I'll Manually Check My Scans Results
- Send An Email Notification
- Select a user from the drop-down list or type an email address in the entry field and click Enter.
- To add additional email addresses, click the plus (+) icon and type the addresses in the entry field.
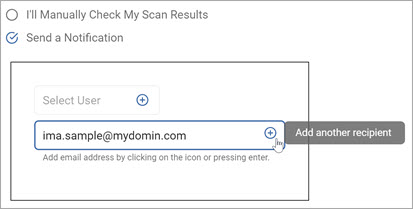
- Click Next to proceed, Previous to return to the previous screen, or Exit Without Saving
to discard. - On the Summary screen, select the chevron (>) next to a section to open and review your scan settings.
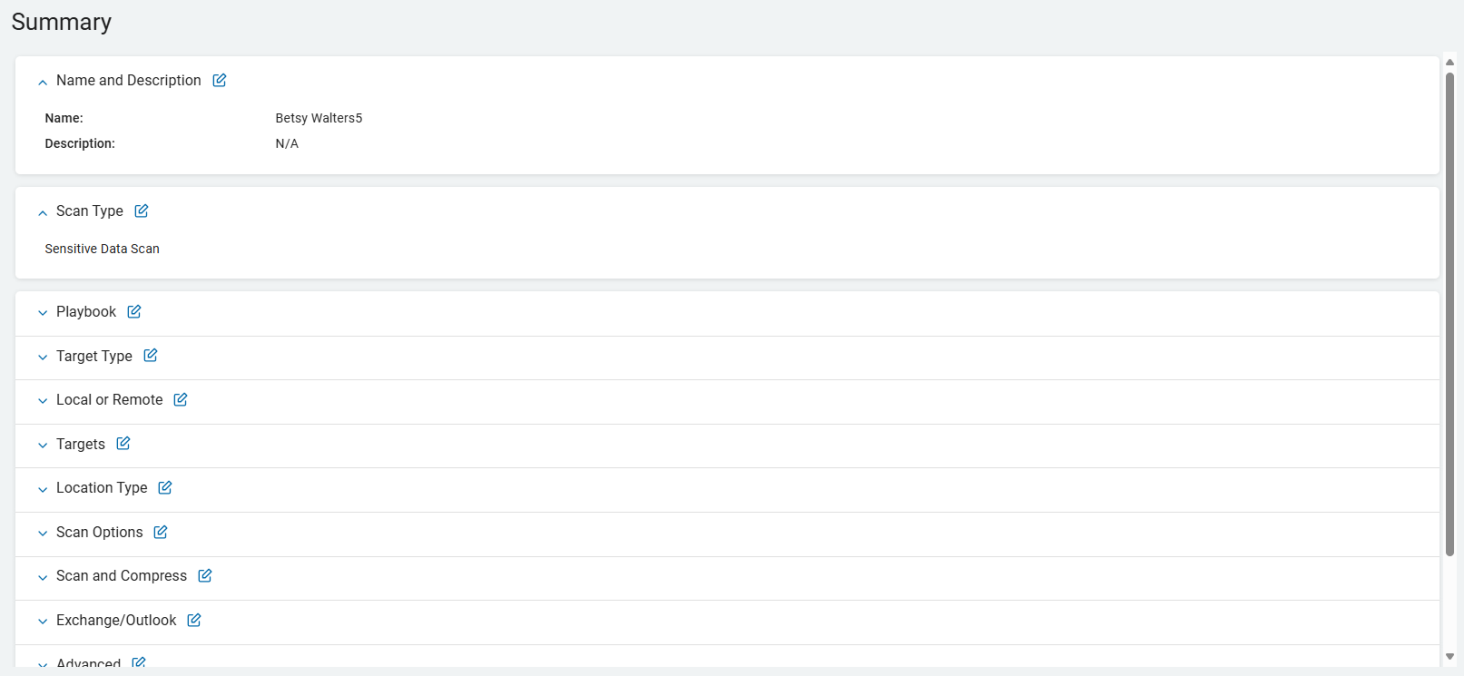
- Use the edit icon link to jump to a specific screen to edit a setting.
- Click Finish & Save to add the new Scan, Previous to return to the previous screen, or Exit Without Saving to discard.
Create a Website Scan
Procedure:
- Click the Website tile.

- Click Next to proceed, Previous to return to the previous screen, or Exit Without Saving
to discard. - When you select the Website tile, the Select the agent(s) to perform the scan screen opens.
- To select an agent, expand the chevron (>) next to an agent listing.
- To select an agent, click the arrow next to the agent name and move the agent from All On-Prem Agents list to the Selected All-Prem Agents list.
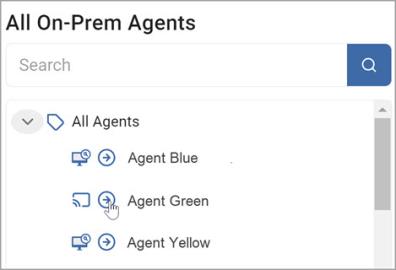
- To move an agent from the Selected On-Prem Agents list back to the All On-Prem Agents list, click the arrow next to the agent name.

- Click Next to proceed, Previous to return to the previous screen, or Exit Without Saving
to discard. - On the Select the target(s) to scan screen, select the chevron (>) to expand the target listing.
- To select an target, click the arrow next to the target name and move the target from All Targets list to the Selected Targets list.
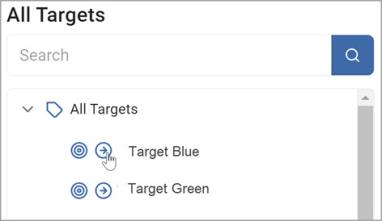
- To move target from the Selected Target list back to the All Targets list, click the arrow next to the target name.

- Click Next to proceed, Previous to return to the previous screen, or Exit Without Saving
to discard. - On the Select website options screen select search parameters.

Search Linked Web Page Content
Search files linked from web pages in the Website search.
To disable the searching of web pages in the Website search, set this value to "False" (0).
Yes (default)
No
Search file content
Yes
No
- Click the Advanced Options button if applicable.
- Click Next to proceed, Previous to return to the previous screen, or Exit Without Saving
to discard. - On the Website Options - Advanced Options screen, enter values, if applicable:
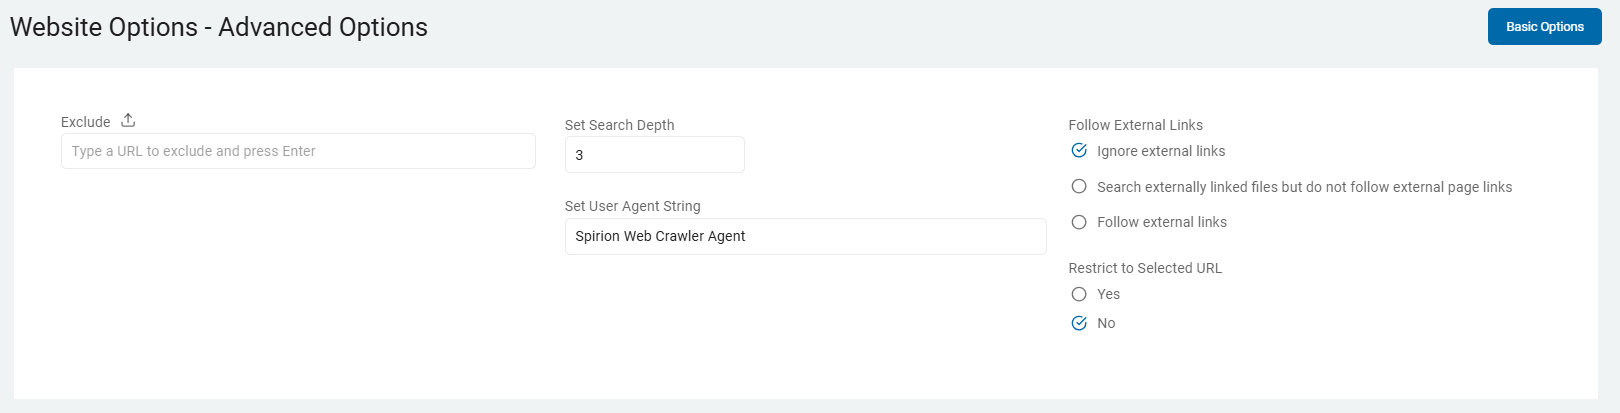
Enter any URL address to exclude from the Website scan
Specify the maximum depth to crawl
By default, the user agent string used by the endpoint application during the Website search is, "Spirion Web Crawler Agent"
To set a custom value for the webcrawler, change this value
Ignore External Links - Default
Search externally linked files but do not follow external page links - To disable the searching of files linked from web pages in the Website search, set this value to "False" (0)
Follow External Links
Only search pages and files in folders that are subfolders of the specified folder(s):
Do not restrict (Default)
Restrict
When enabled, only web pages and files that are in folders that are subfolders of URLs specified in the URL list are searched.
For example, if the URL http://www.website.com/folder is specified in the list, the default behavior is to read all of the pages in that folder and follow all of the links (with respect to other settings such as link depth and redirect policy, of course) such as a link to http://www.website.com/folder2/page1.html.
When this setting is enabled, links outside of /folder are not followed.
- Click Next to proceed, Previous to return to the previous screen, or Exit Without Saving
to discard. - On the Select file type scan options screen are additional Basic Options.
These options are described and detailed in Scan Options.
- Select the Advanced Options button to add additional options.
- The Select file type scan options - Advanced Options screen displays the advanced options.
These options are also described and detailed in Scan Options.
- Click Next to proceed, Previous to return to the previous screen, or Exit Without Saving
to discard. - More options appear on Select advanced options screen.

These options are described and detailed in Scan Options.
- Click Next to proceed, Previous to return to the previous screen, or Exit Without Saving
to discard. - On the Select Discovery Team settings screen, choose the options to use.
Note: The screen only displays when multiple On-Prem agents are selected.
Agent version 13.2+: Ensure these ports are open.
Ports 5671 & 5672: Use these settings:
Open for Inbound TCP communication on the Discovery Agent.
Open for Outbound TCP communication on ALL other agents involved in the same scan to the Discovery Agent.
Note: This communication is for reading and writing information to the message queue.
Ports 15671 & 15672: Use these settings:
Open for Inbound TCP communication on the Discovery Agent
Open for Outbound TCP communication on ALL other agents involved in the same scan to the Discovery Agent.
Note: This is for the Message Queue Management Interface and API.
Discovery Agent: Select an agent from the drop-down list.
Note: Distributed scans use the assigned discovery agent to conduct location discovery and provide a queue for all other agents to be assigned locations for scanning. While the Discovery Agent can be manually chosen, it is recommended that you use the preferred Discovery Agent.
Configure Agent IPs: If your organization requires it, you can set a specific IP address.
In the Add New IP Address window, type the new IP address and click the plus icon.
Hover over the new IP address more options menu and click Make Default.
Click Save to apply or Cancel to discard.
Note: Distributed scans use the assigned discovery agent to conduct location discovery and provide a queue for all other agents to be assigned locations for scanning.
While the Discovery Agent can be manually chosen, it is recommended that you use the preferred Discovery Agent.
Agent version 13.0 and legacy Agents: Choose from these options.
These options are described and detailed in Scan Options.
Click Next to proceed, Previous to return to the previous screen, or Exit Without Saving
to discard.The next screen is the Select the scan schedule screen. To set up date, time, and / or recurrence, see How to Set the Date and Time of a Scheduled Scan.
Click Next to proceed, Previous to return to the previous screen, or Exit Without Saving
to discard.On the Select who should receive notification of scan completion screen, select how to send email notifications.
I'll Manually Check My Scans Results
Send An Email Notification
- Select a user from the drop-down list or type an email address in the entry field and click Enter.
- To add additional email addresses, click the plus (+) icon and type the email addresses in the entry field.
- Click Next to proceed, Previous to return to the previous screen, or Exit Without Saving
to discard. - On the Summary screen, select the chevron (>) next to a section to open and review your scan settings.
- Use the edit icon link to jump to a specific screen to edit a setting.
- Click Finish & Save to add the new Scan, Previous to return to the previous screen, or Exit Without Saving to discard.